
Honey Bear Crochet Pattern
Here’s how to crochet a honey bear with a honey pot, flower crown, and bee!
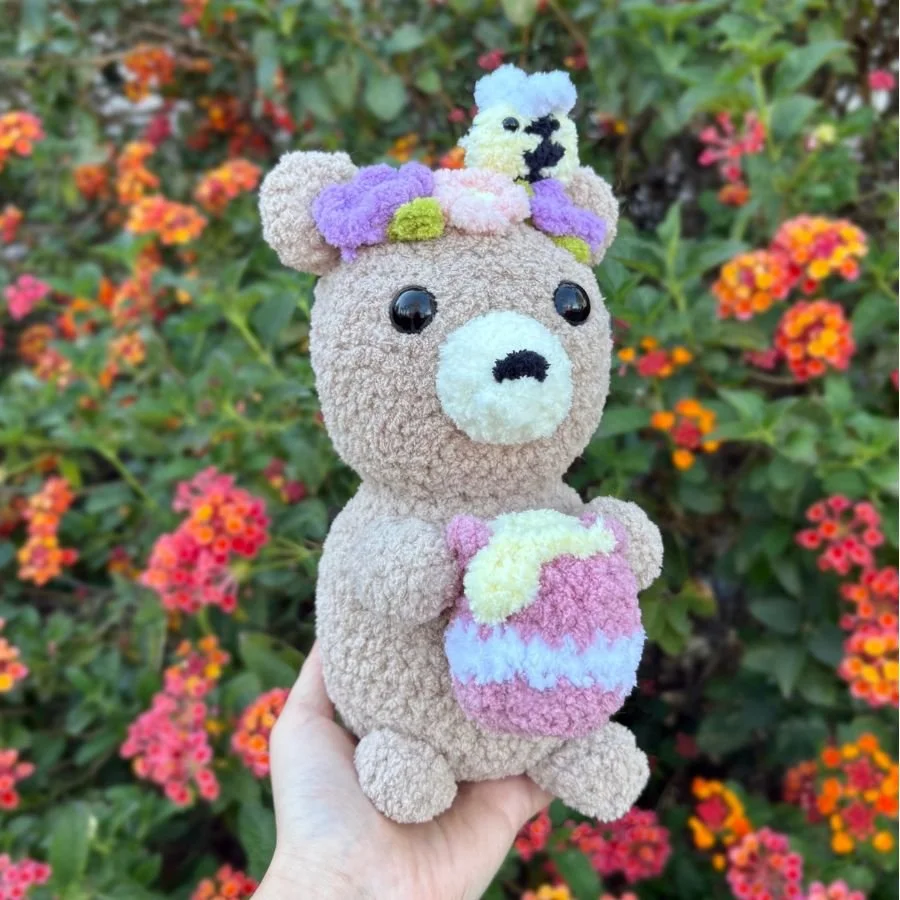
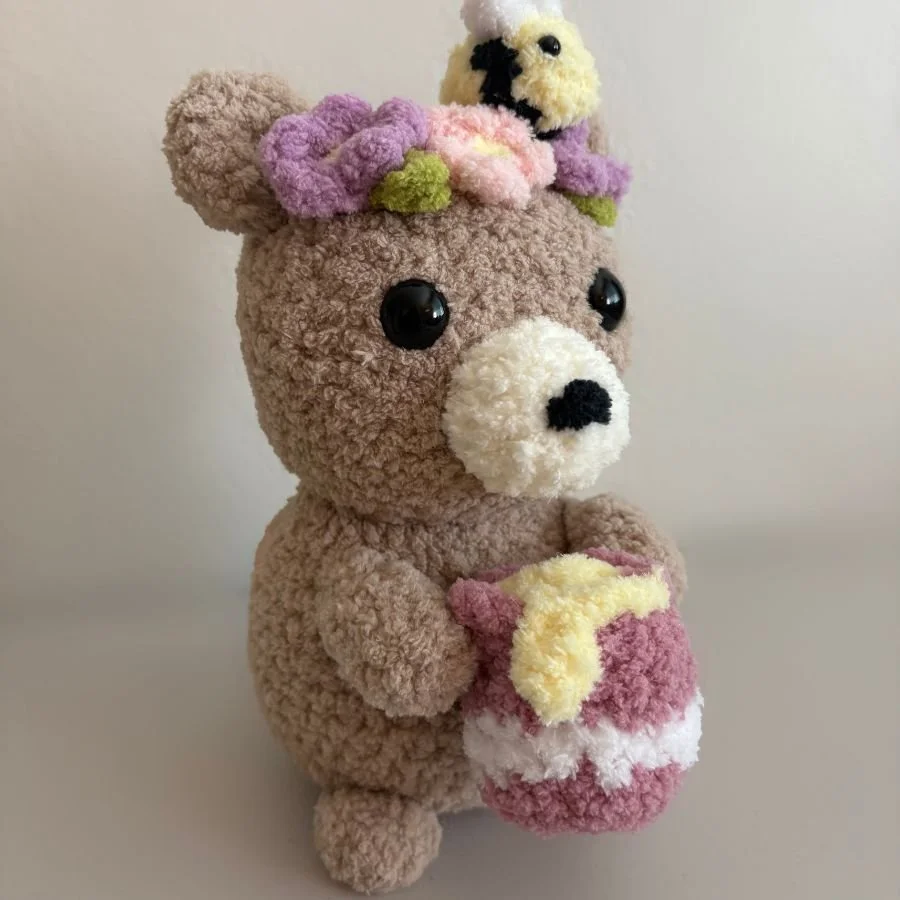
Over a year ago, I designed this honey bear and wanted it to have as many cute little details as possible. I couldn’t decide whether a bee, a flower crown, or a honey pot was the cutest for a honey bear. So why not all of them?
Of course, you can pick and choose the elements that you’d like to keep for your honey bear or you can even add more.
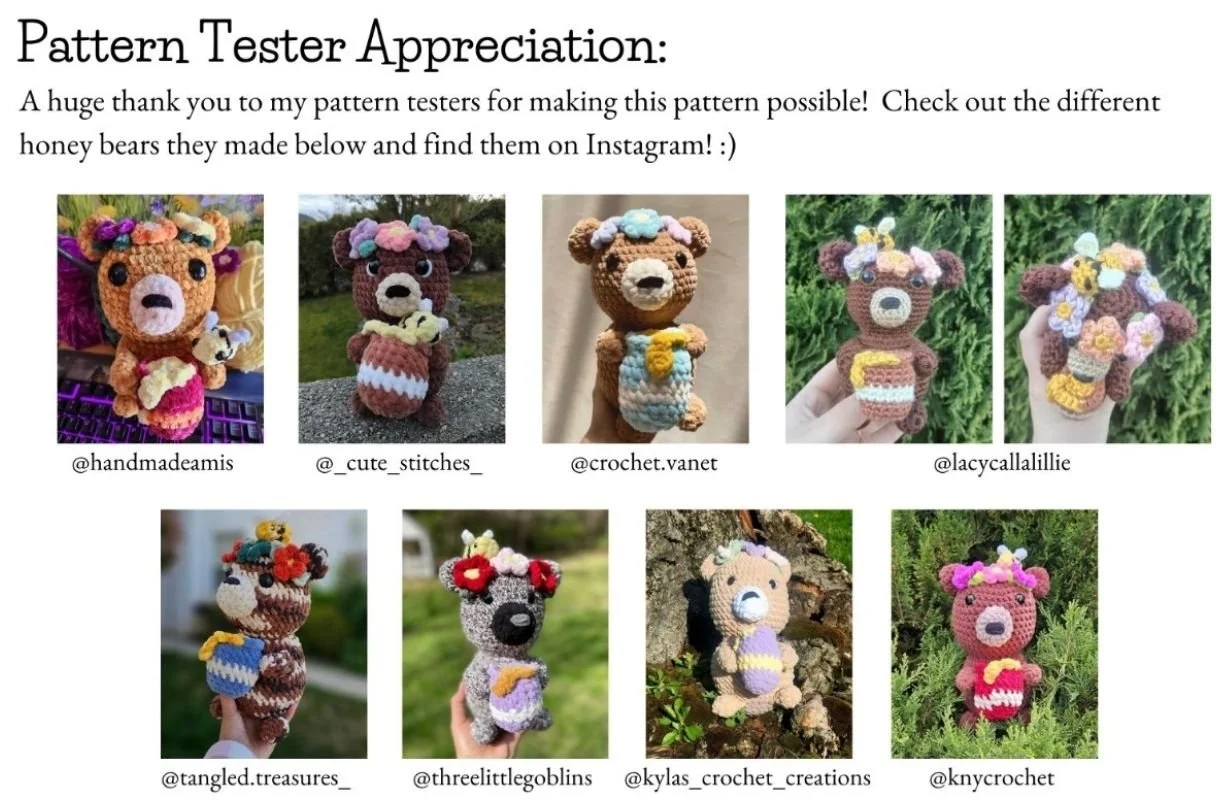
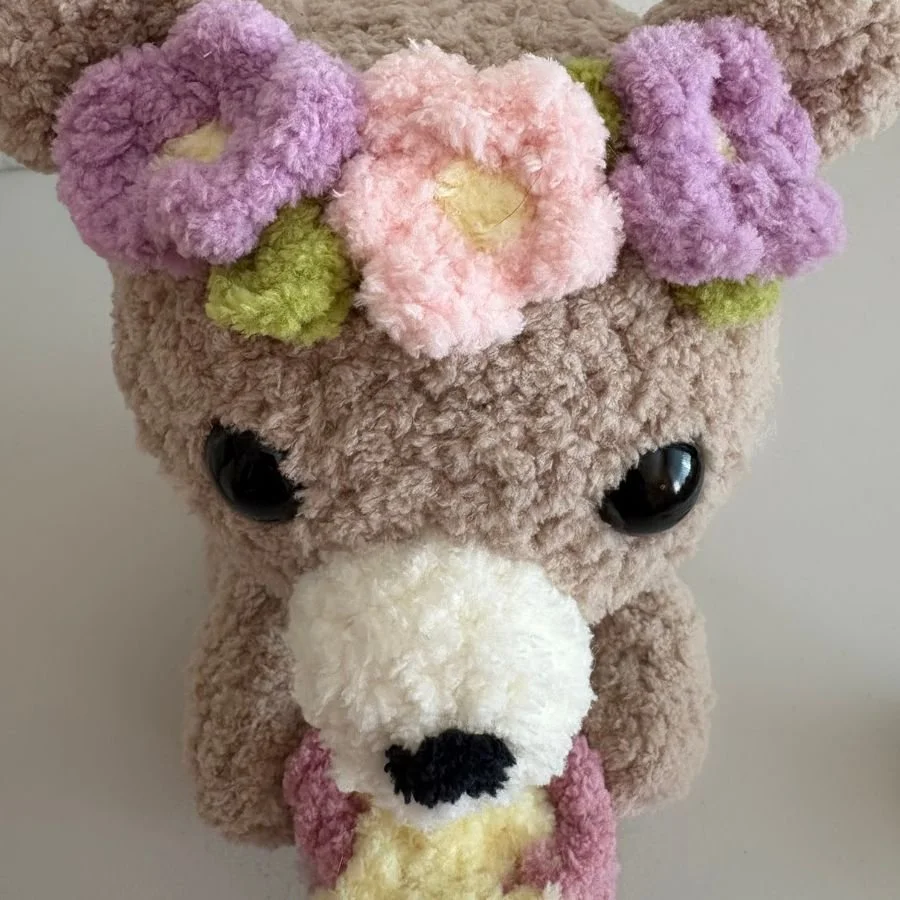
Add a flower to the pot or more flowers around the head to create a complete flower crown like one of my testers did (picture shown in tester appreciation below). Move the bee to the arm, the nose, or the top of the honey pot . . . or make multiple bees to perch in more than one of these places.
This pattern was originally released in April 2025 on Etsy and Patreon, and I wanted to now bring the pattern to my blog too!
A PDF version of this pattern with more pictures can be found on Etsy and Patreon.
So let’s get into the pattern!
Unless otherwise indicated, this pattern is designed to be crocheted in continuous rounds (or spirals).
Terms of Use:
This crochet pattern is designed by me (The Mary Jay). Do not copy, sell, duplicate (to distribute) the contents of this crochet pattern in any format without permission.
If you’d like to share this pattern, please only do so by linking to this blog post or sharing where to find its original source. Do not claim the pattern as your own or copy any part of the pattern to post, share, or publish anywhere else without written permission.
You’re absolutely welcome to sell the plushies you make using this pattern provided that you give pattern credit to The Mary Jay (and/or @themaryjay). I’d also super appreciate if you’re able to include where to find this pattern (www.themaryjay.com) when possible.
Respecting these terms helps me to continue creating and offering free patterns like this to you, and I truly appreciate your support!
p.s. If you post your plushie, tag me @themaryjay on Instagram, Tik Tok, YouTube etc. I’d love to see it and hype you up!
Skills and Abbreviations: (In U.S. terms)
MR= Magic Ring (Magic Circle)
SC= Single Crochet
SL ST= Slip Stitch
HDC= Half Double Crochet
DC= Double Crochet
INC= Increase
DEC= Decrease
FLO= Front Loop Only
BLO= Back Loop Only
CH= Chain
FO= Fasten off
R= Round/Row
Change Color
Turn= Flip your work to crochet the row in the opposite direction
Materials:
Disclosure: The links to the materials below are affiliate links, which means I may earn a small commission at no extra cost to you if you use them to make a purchase. This is an additional way that helps support my work and lets me continue to make free content for you.
Alize Softy Plus yarn in Brown, Beige, Yellow, White, Black, Brownish Red, Purple, Pink, and Green OR substitute with the colors of your choice
I used around 93 yards for the Brown main color and less than 9 yards for each of the other colors
For all other materials, you can find most of what I use on my Amazon storefront.
Two 16 mm Safety Eyes (for the bear)
Two 5 mm Safety Eyes (for the bee)
4 mm Crochet Hook
Stuffing
Scissors
Yarn Needle
Pins & Stitch Markers (Optional)
Head
Using Brown
R1: 6 SC in a MR (6)
R2: [INC] x 6 (12)
R3: [SC, INC] x 6 (18)
R4: [2 SC, INC] x 6 (24)
R5: [3 SC, INC] x 6 (30)
R6: [4 SC, INC] x 6 (36)
R7: [5 SC, INC] x 6 (42)
R8-15: 42 SC (42) 8 Rounds
R16: [5 SC, DEC] x 6 (36)
R17: [4 SC, DEC] x 6 (30)
R18: [3 SC, DEC] x 6 (24)
R19: [2 SC, DEC] x 6 (18)
Do NOT fasten off here.
Attach the eyes between rounds 8 and 9 around 7 stitches apart. Add stuffing and then continue on to the next round to make the body.
Body
Continuing from the head
R20: [INC] x 18 (36)
R21:[11 SC, INC] x 3 (39)
R22: [12 SC, INC] x 3 (42)
R23-29: 42 SC (42) 7 Rounds
R30: [5 SC, DEC] x 6 (36)
R31: 36 SC (36)
R32: [4 SC, DEC] x 6 (30)
R33: [3 SC, DEC] x 6 (24)
Add stuffing and continue stuffing as you go.
R34: [2 SC, DEC] x 6 (18)
R35: [SC, DEC] x 6 (12)
R36: [DEC] x 6 (6)
FO leaving a tail for sewing. Finish stuffing.
Use the yarn tail to sew the plushie closed.
You are now finished with the base of the bear!
Tail
Using Brown
R1: 5 SC in a MR (5)
R2: [INC] x 5 (10)
R3: 10 SC (10)
R4: [3 SC, DEC] x 2 (8)
FO leaving a long tail for sewing.
Add stuffing to the tail.
Ears (Make 2)
Using Brown
R1: 6 SC in a MR (6)
R2: [INC] x 6 (12)
R3: [SC, INC] x 6 (18)
R4: 8 SC (18)
R5: [DEC] x 9 (9)
FO leaving a long tail for sewing.
Do not stuff the ear.
Fold the ear in half and sew across the bottom with the yarn tail that we left for sewing. Leave the rest of the tail to sew the ear to the head later.
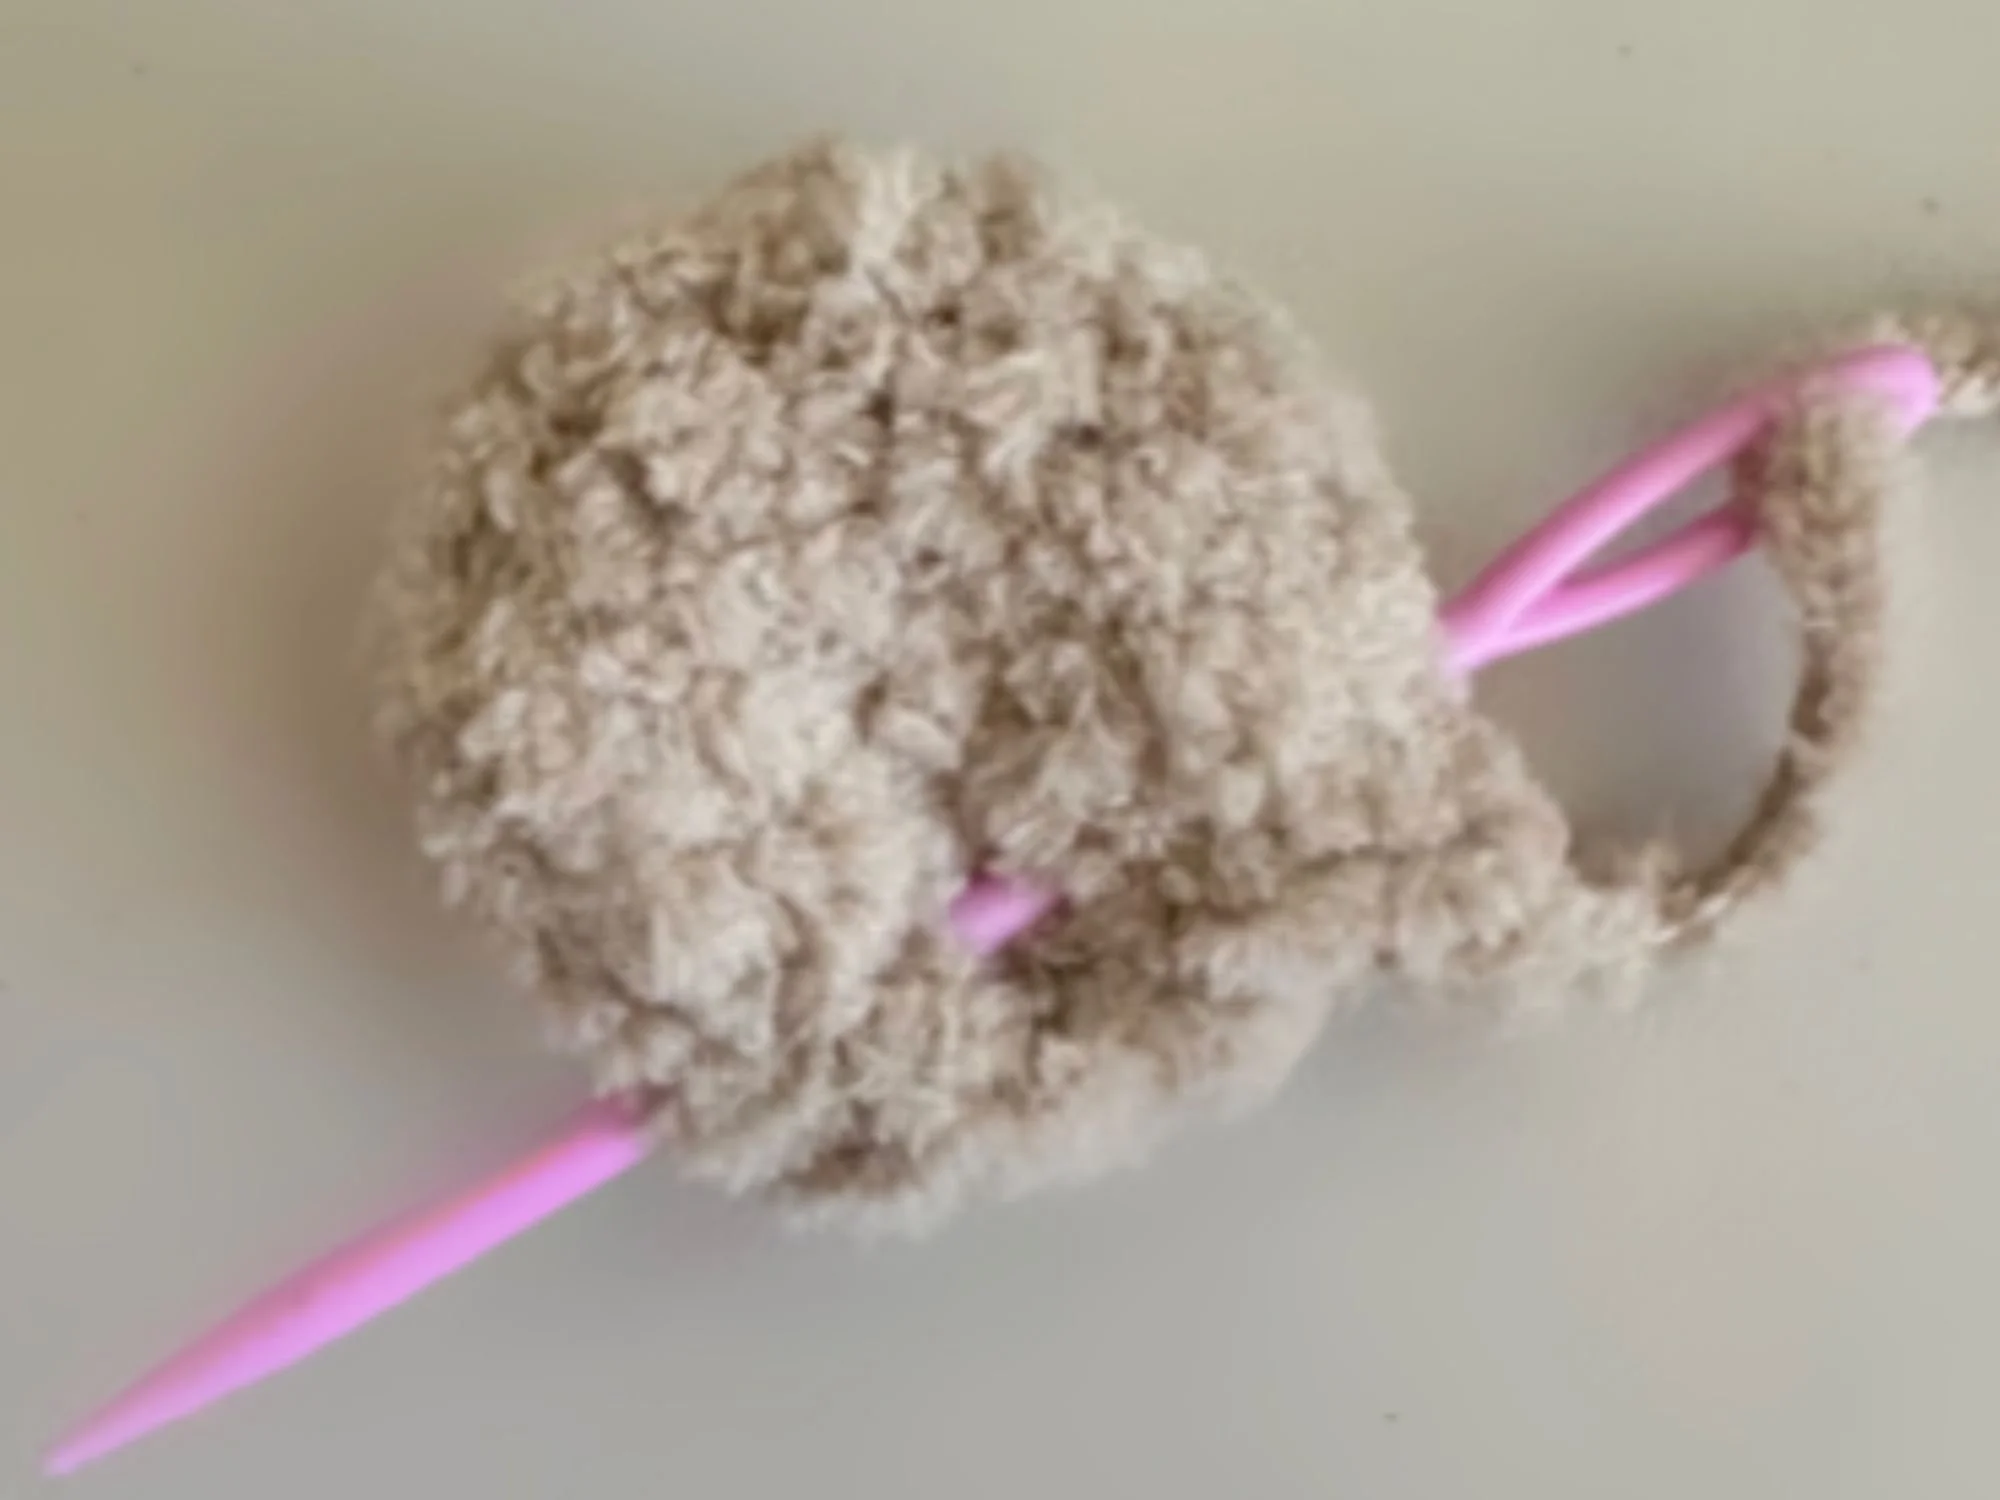
Sewing across the bottom of the ear (Picture Reference)
Arms (Make 2)
Using Brown
R1: 8 SC in a MR (8)
R2-5: 8 SC (8) 4 Rounds for 32 SC total
R6: [2 SC, DEC] x 2 (6)
Add stuffing
R7: Fold the remaining stitches of the arm in half. Working through the stitches on both sides, make 3 SC (3)
FO leaving a long tail for sewing.
Feet (Make 2)
Using Brown
R1: 10 SC in a MR (10)
R2: [4 SC, INC] x 2 (12)
R3: [4 SC, DEC] x 2 (10)
R4: [3 SC, DEC] x 2 (8)
Lightly stuff
R5: Fold the remaining stitches of the foot in half. Working through the stitches on both sides, make 4 SC (4)
R6: CH 1 and turn, [DEC] x 2 (2)
FO leaving a long tail for sewing.
Snout
Using Beige
R1: 5 SC in a MR (5)
R2: [INC] x 5 (10)
R3: [SC, INC] x 5 (15)
R4-5: 15 SC (15) 2 Rounds
FO leaving a long tail for sewing.
Using Black, embroider on the nose between rounds 1 and 2 along the top side of the snout. You can also choose to do this after sewing the snout onto the face.
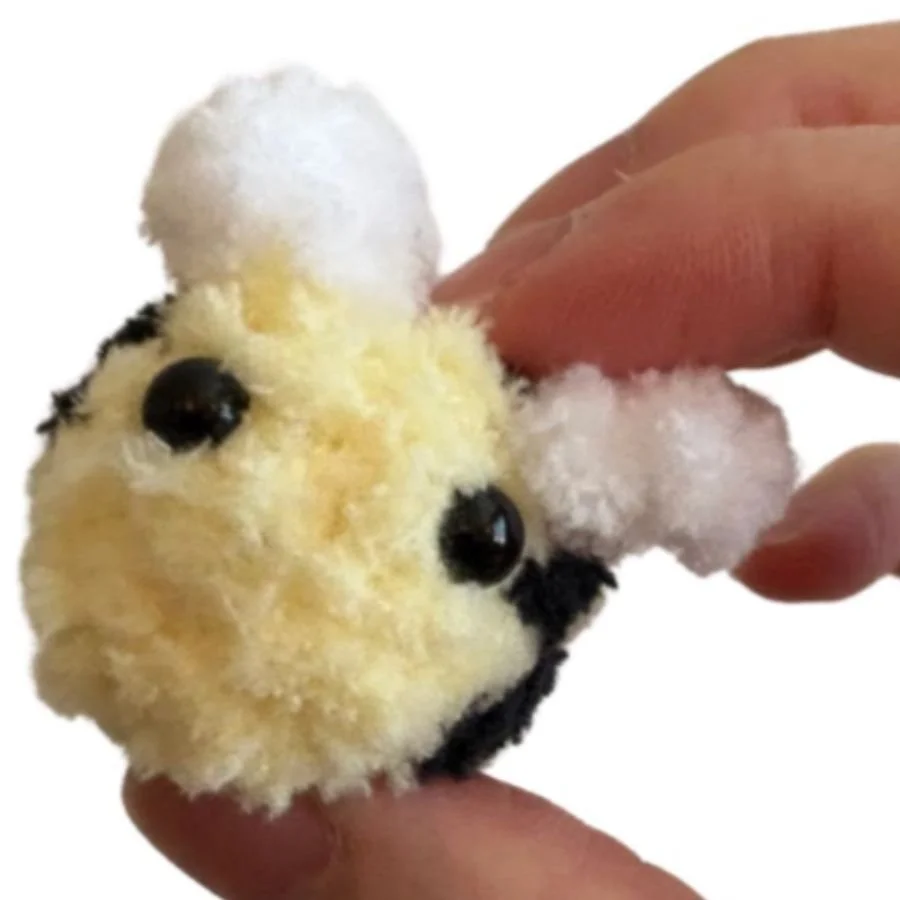
Bee
Using Yellow
R1: 6 SC in a MR (6)
R2: [SC, INC] x 3 (9)
R3: 9 SC (9)
Change Color to Black
R4: 9 SC (9) Tip: If the stripe appears too thin with the yarn that you're using, feel free to add an extra round of black
Change Color to Yellow
R5-6: 9 SC (9) 2 Rounds
Attach the eyes between R2 and 3. Add stuffing and continue stuffing as you go.
R7: [SC, DEC] x 3 (6)
FO leaving a tail for sewing. Finish stuffing.
Use the yarn tail to sew the plushie closed.
Wings: (Make 2)
Using White
R1: 4 SC in a MR (4)
FO leaving a long tail for sewing. Sew the wings onto the black stripe and around 2 stitches apart.
Honey Pot
Using Brownish Red
R1: 8 SC in a MR (8)
R2: [INC] x 8 (16)
R3: In BLO, 16 SC (16)
R4: [7 SC, INC] x 2 (18)
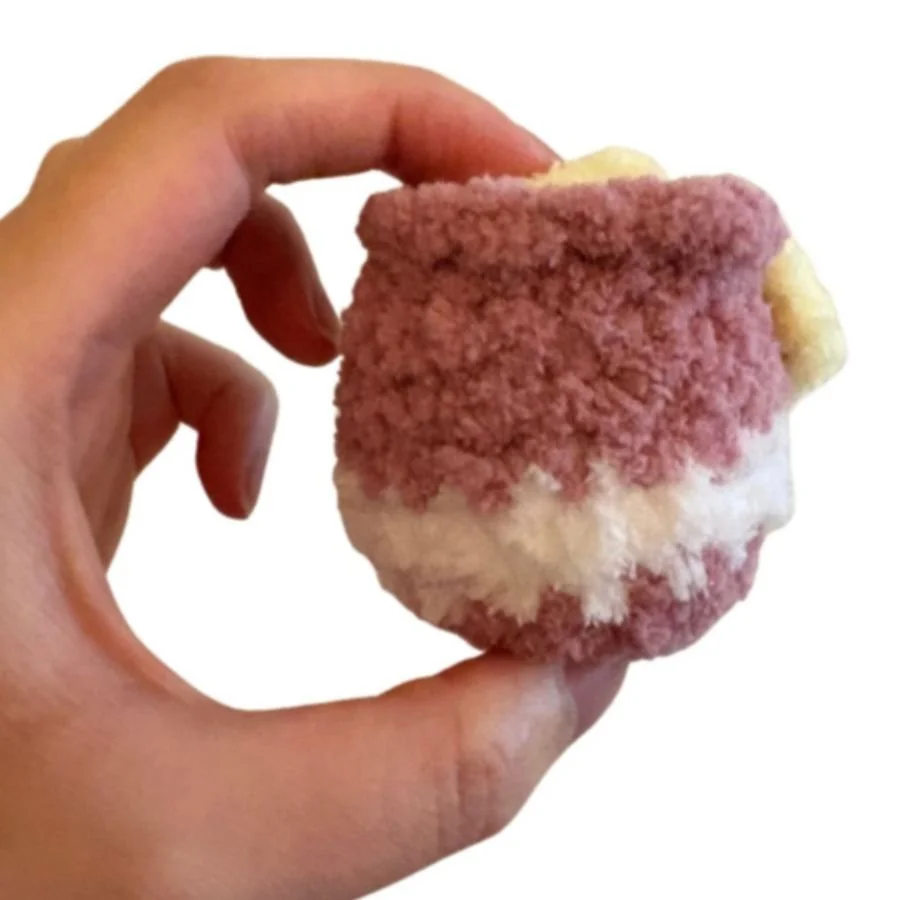
Change Color to White (Note: With the way the honey pots are positioned with the bears in my example photos, the color change will be in a noticeable spot so a seamless color change is highly recommended for the stripe on the pot. But if you’re not familiar with this color changing technique, I also provide some tips on other ways that you can hide the color changes in assembly.)
R5: [8 SC, INC] x 2 (20)
R6: 20 SC (20)
Change color to Brownish Red
R7-8: 20 SC (20) 2 Rounds
R9: [8 SC, DEC] x 2 (18)
R10: [7 SC, DEC] x 2 (16)
Tip: Place a stitch marker into the first back loop of R10 to mark it for later.
In R11, we’ll be changing colors to Yellow for the last part of the round. The entire round is worked in FLO.
R11: In FLO: [3 SC, INC] x 3, SC
Change color to Yellow
In FLO: 2 SC, INC (20)
R12 CH 5,
Starting in the second chain from the hook, make SC, DC, 2 SC in the chains.
Now working in the BLO of R10 (where we placed the stitch marker): [2 SC, DEC] x 4 (12)
Add stuffing
R13 [DEC] x 6 (6)
FO leaving a long tail for sewing. Finish stuffing.
Use the yarn tail to sew the plushie closed. Also sew the dripping honey (the section that we made in the chains in R12) to the side of the pot.
Flowers
Center Flower:
Using Yellow
R1: 5 SC in MR (5)
Change Color to Pink
R2: [SL ST, CH 1, HDC, CH 1, SL ST] in each stitch for a total of 5 petals.
FO leaving a long tail for sewing.
Side Flowers: (Make 2)
Using Yellow
R1: 5 SC in MR (5)
Change Color to Purple
Tip: Place a stitch marker into the back loop of the first stitch to make it easier to find later.
R2: In FLO: [SL ST, CH 1, HDC, CH 1, SL ST] in each stitch for a total of 5 petals.
Flip the flower over and change color to Green by pulling the yarn through the loop on the hook. Secure the yarn strands.
R3 Work in the BLO of R1 for the entire round.
In the first back loop: SL ST, CH 3 and starting with the second chain from the hook, make 1 SC, 1 HDC down the chain. Then return to working in the back loops along the round and make 2 SL ST (or a SL ST in the next two stitches.) A picture reference of R3 can be found below.
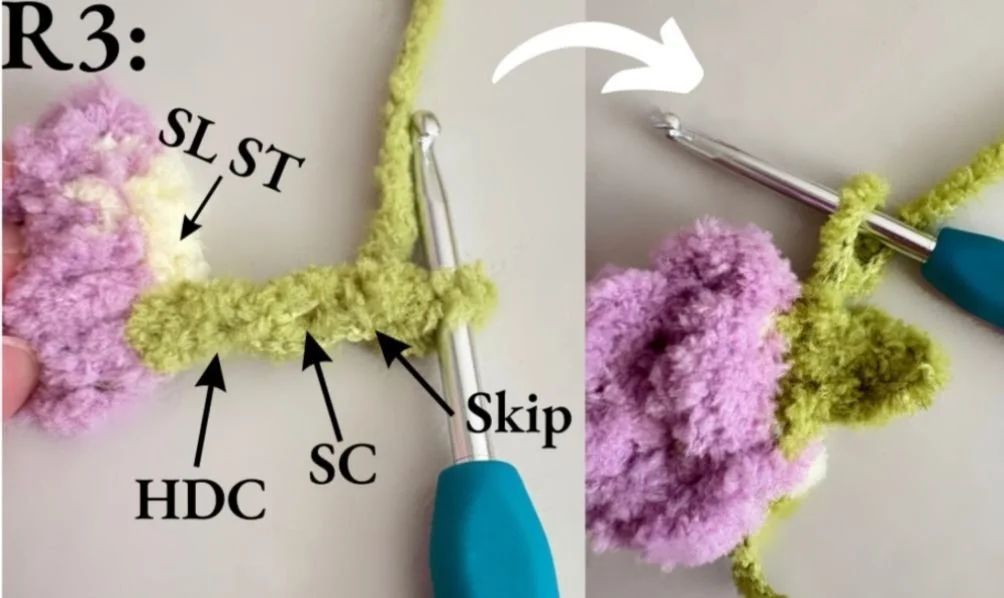
R3 of Side Flower (Picture Reference)
Repeat 1 more time to make a second leaf and then SL ST into the first stitch.
FO leaving a long tail for sewing.
Assembly:
Optional: Use pins to hold the pieces in place to help with the placement.
Snout:
Sew the snout onto R9 through R14 of the face and centered to the eyes. When you’re 75% of the way done with sewing on the snout, add stuffing before sewing on the rest of the snout.
Ears:
The ear should be flat so that you are sewing across both sides of the opening of the ear. Sew the ears onto R5 through R7, where the bottom of the ears are around one round above the eyes and around 7 stitches away from where the eyes were placed.
Arms:
Angle the arms forward towards the front of the bear and sew them onto R22 and R23 of the body and around 12 stitches apart along the front of the bear. Sew down a few extra rounds of the arms to the body to help hold them forward.
Feet:
With the feet pointing forward, sew the flat part of the feet (R5 and R6 of the feet) onto R33 and R34 on the bottom of the bear. They should be around 4 stitches apart from each other.
Tail:
Sew the tail onto R30 through R32 on the back of the bear.
Flowers:
Sew the flowers on top of the head and in front of the ears by sewing along the inner edges of the petals (for the center flower) and leaves (for the side flowers). This allows the petals and leaves to flare upward. Hide the extra yarn tails underneath the flowers when you sew them on or weave them in.
Honey Pot:
Place the honey pot between the arms and sew each side of the pot to each arm.
I sewed R10 of my honey pot onto the bear’s arms. However if you did not use a seamless color change method, you can also choose to cover the color changes by hiding them under an arm and sewing the stripe portion of the pot (R5 and 6) to the arms instead.
Another way to hide the color change is to use yellow yarn and embroider a “drop of honey” on top of the color change (as shown in the picture below). You can do this by just looping the yarn around a few times until it forms a dot.
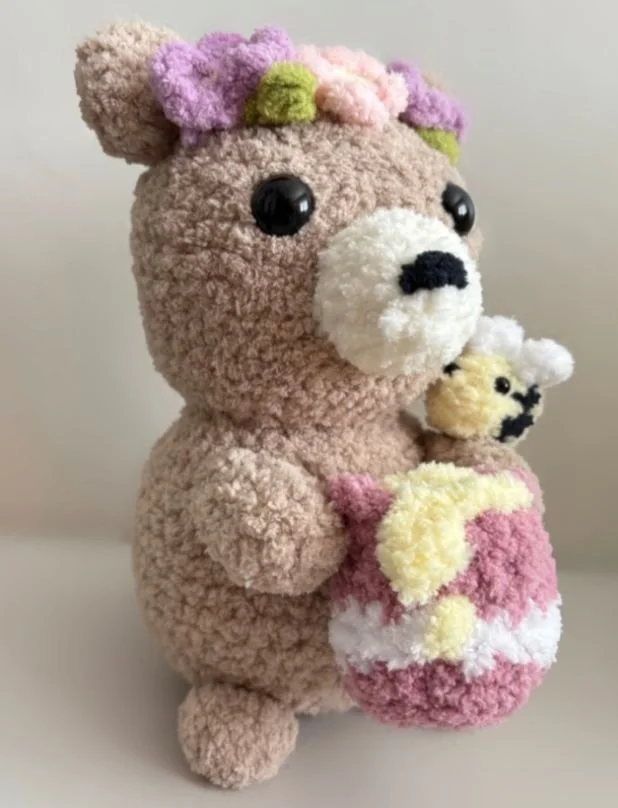
Example of using a “drop of honey” to cover the color change.
Bee:
The bee can be attached to a variety of places. You can sew it on top of the nose, on the flower crown, on the bear’s arm, or on top of the honey pot.
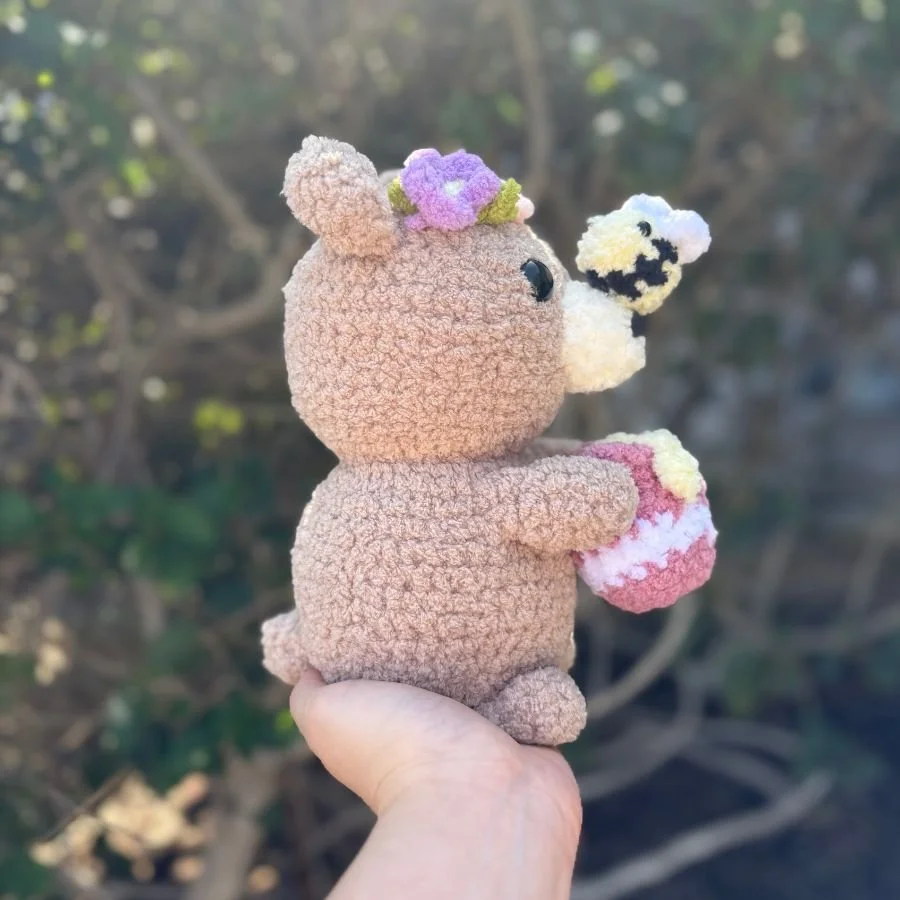
Congratulations! You did it!
Thank you for following along with my pattern and taking the time to crochet a honey bear!
If you enjoyed this pattern, don’t forget that you can subscribe to my mailing list to receive updates on new patterns straight to your inbox.
Please feel free to share the link to this post or where to find it with other crocheters. Every share helps support my art, and allows me to continue creating free patterns and resources for you.
If you have any questions or find any mistakes, please feel free to contact me.
I love seeing your work! Follow and tag my socials! Instagram, Tik Tok, YouTube: @themaryjay if you post your plushie!
Ready for your next make?
Find more free patterns here!
You can also find more patterns in my shop or on my Patreon.