
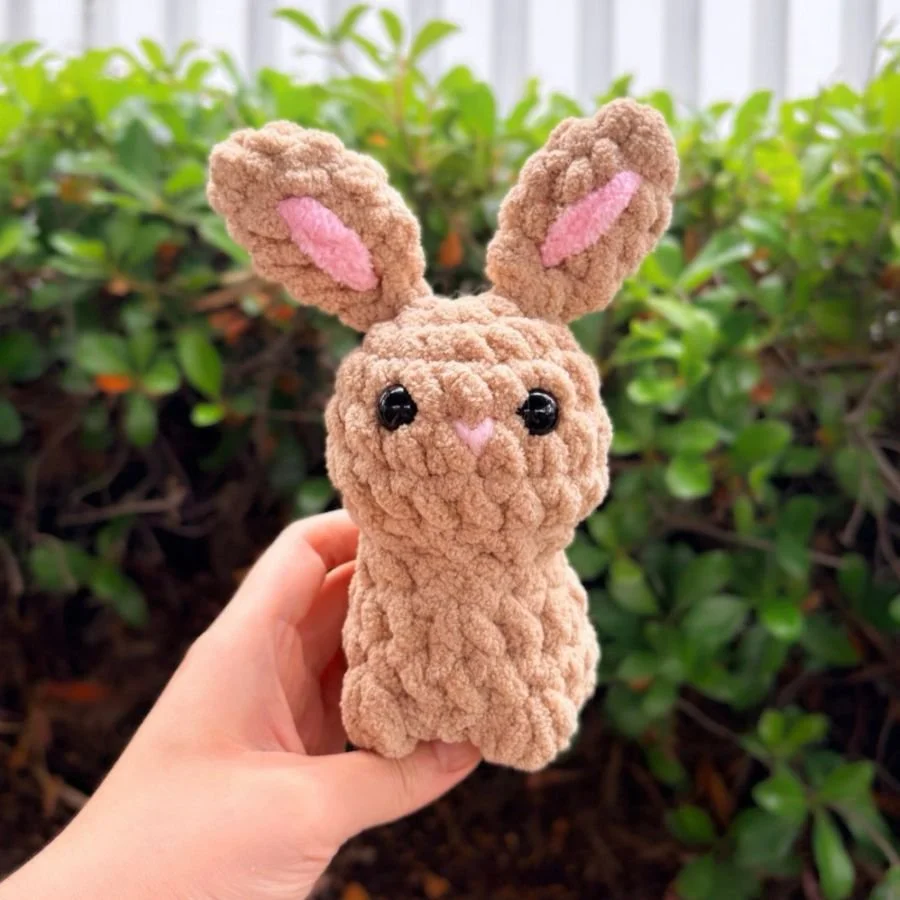
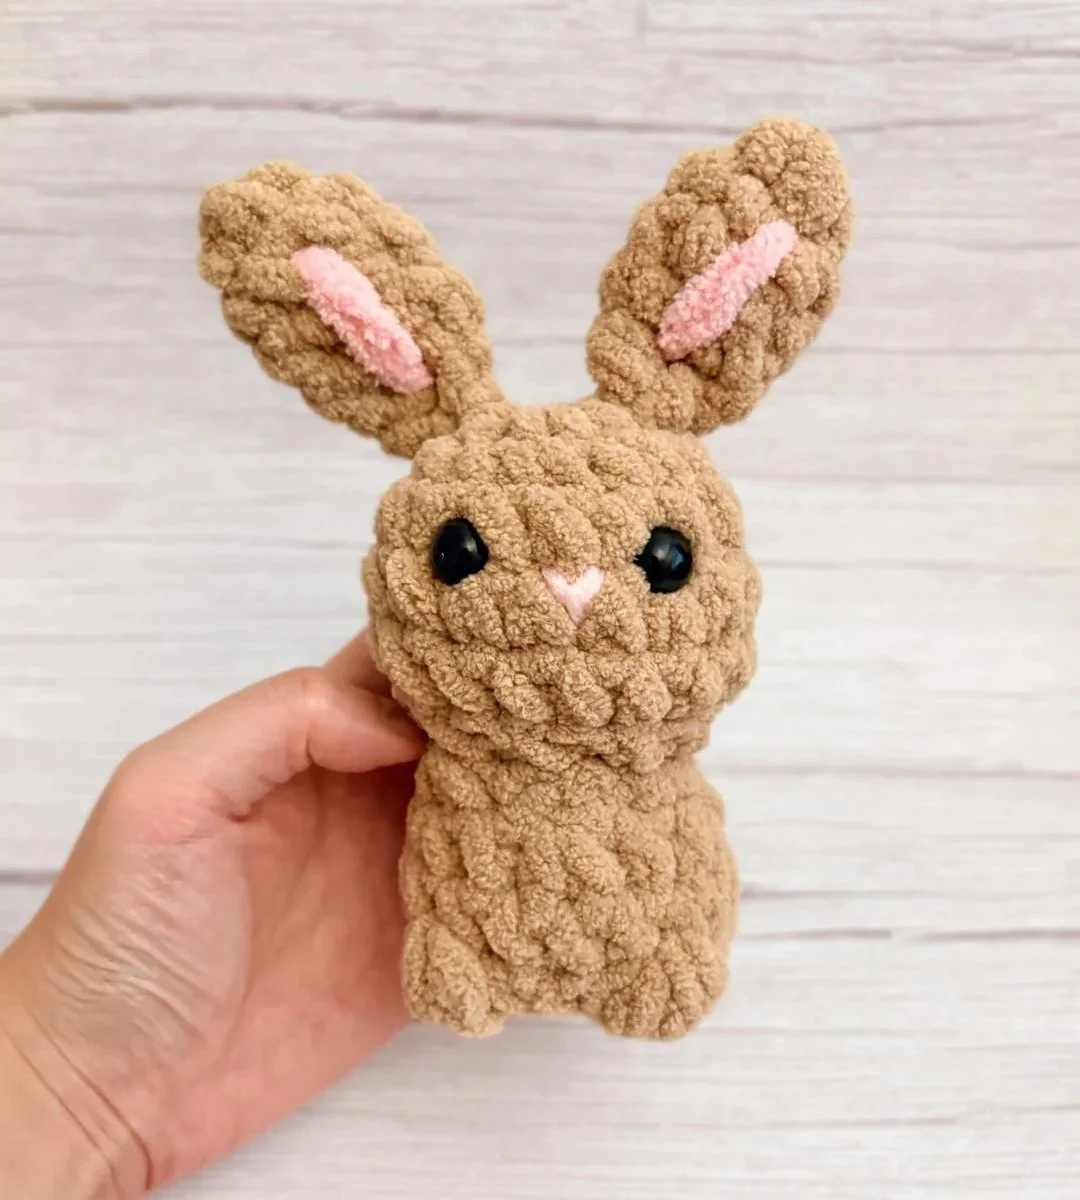
“Cinnamon the Rabbit”Pattern
Named by y’all on my socials, meet “Cinnamon the Little Rabbit!” Here’s how to crochet him!
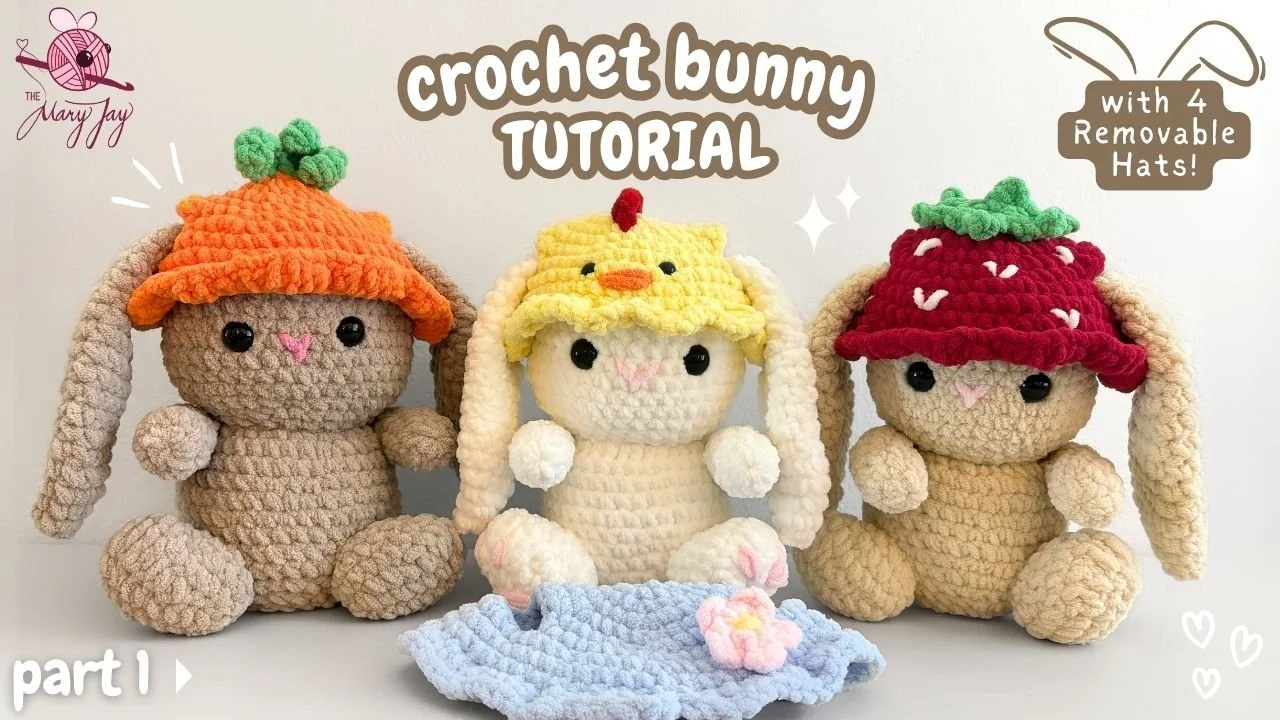
Originally, I designed this rabbit as one of the little garden critters in my flower pot garden set.
The idea was a flower pot that opens up to hold five little garden-themed animals inside. I made some bugs, a hedgehog, a bird, but when I thought about gardens, the animal I thought of the most were the little white-tailed rabbits I used to see all the time in my grandma’s garden.
So even though I’ve already made three other bunny patterns, it was time for another one!
At first, I wanted to match this rabbit to the shape of the little bat and cat in my cauldron plushie set. But it took up so much space inside of the pot that in order to make enough room for the other plushies, I redesigned it into a rounder, more condensed version.
Since I had already made the first rabbit, though, I thought I might as well still share it as a free pattern in case you like this design!
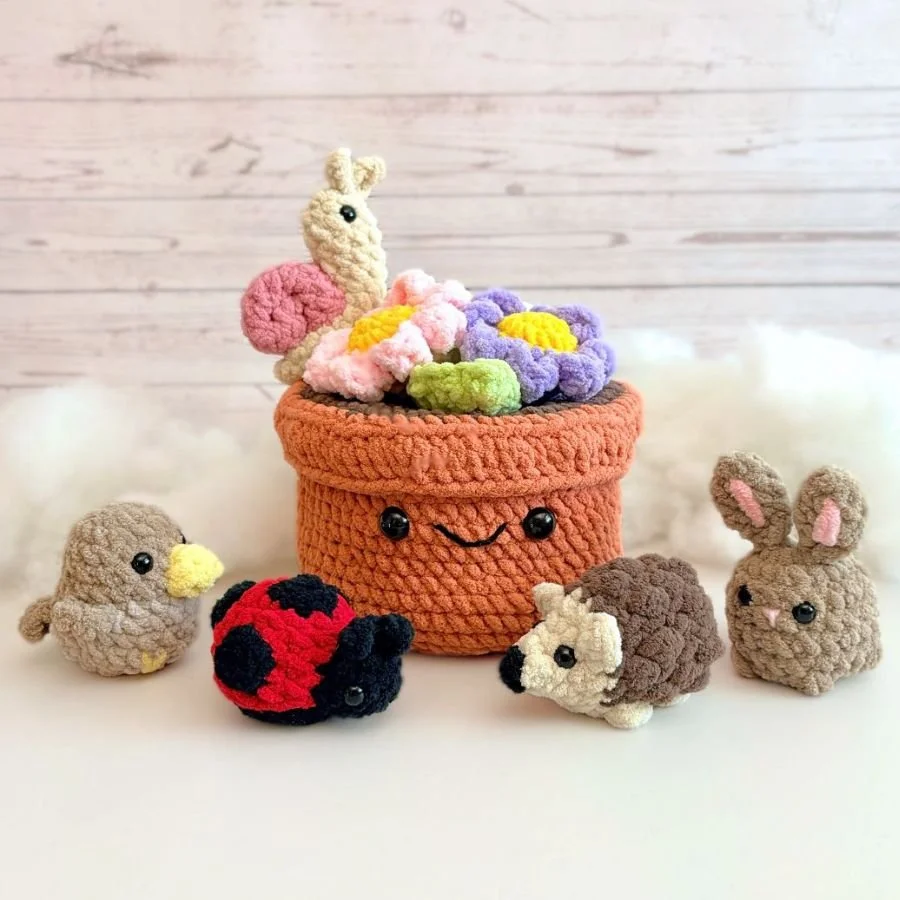
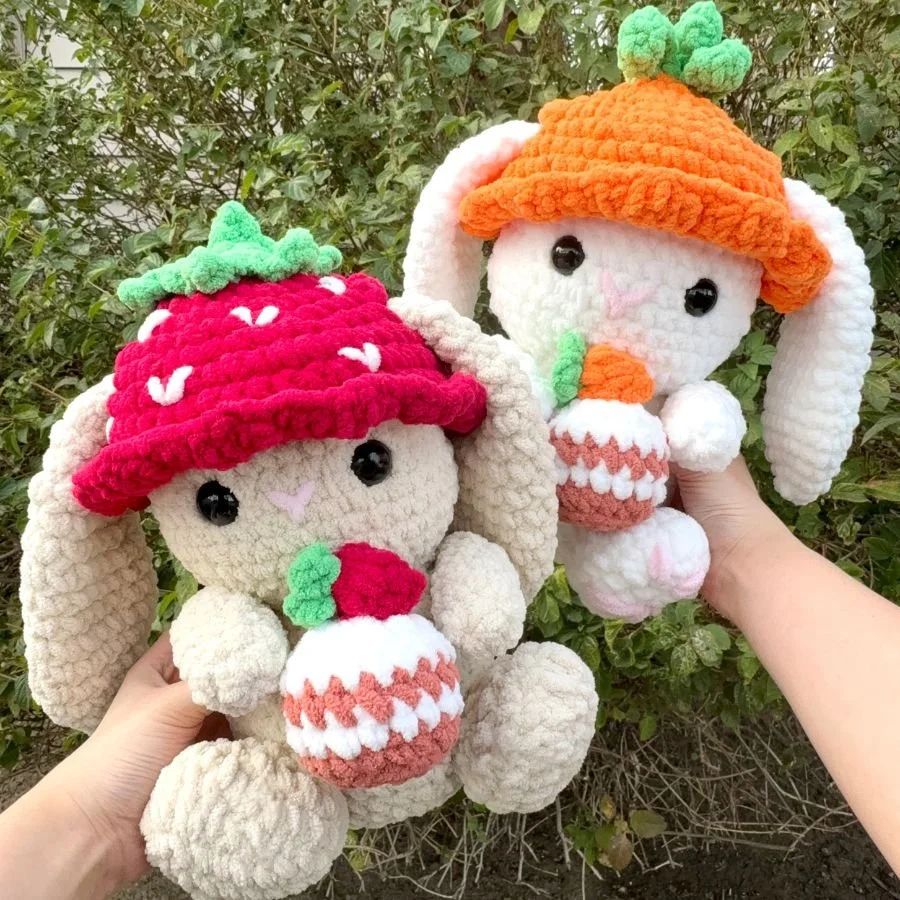
p.s. Check out the garden flower pot set with the second rabbit design! You can find the 6-in-1 pattern here!
So here’s how to crochet this rabbit:
Let’s get into the pattern!
Find the free pattern below or you can find the downloadable PDF version of this pattern on my Patreon.
Terms of Use:
Please do not copy, sell, or duplicate (to distribute) the contents of this crochet pattern in any format without permission. Shares are always appreciated, but please do so by sharing the link to this blog post or where it can be found, as this helps me continue to create free patterns for you!
You’re welcome to sell the plushies you make using this pattern! Please give pattern credit to The Mary Jay and tag me @themaryjay on Instagram, Tik Tok, or YouTube if you post your plushie. I’d love to see them!
Skills and Abbreviations (In U.S. terms)
MR= Magic Ring (Magic Circle)
SC= Single Crochet
SL ST= Slip Stitch
INC= Increase
DEC= Decrease
3-DcBo= 3 double crochet bobble (a bobble made by crocheting 3 partial double crochets together in one stitch)
4-DcBo= 4 double crochet bobble (a bobble made by crocheting 4 partial double crochets together in one stitch)
FLO= Front Loop Only
FO= Fasten off
R= Round/Row
Change Color
Materials:
(Based on what I used to make the rabbit in the sample photos)
Disclosure: This section contains affiliate links, which means I may earn a small commission at no extra cost to you if you use them to make a purchase. This is an additional way that helps support my work and lets me continue to make free content for you.
Super Bulky Weight Yarn (#6) in Brown and Pink
The yarn I used is from Premier: Basix Chenille Brights or the x Mama Made Minis Collection
For all other materials, you can find most of what I use on my Amazon storefront.
Worsted Weight Yarn (#4) in Pink for the detailing
Two 12 mm Safety Eyes (Warning: Safety eyes can be choking hazards and are generally not recommended when crocheting plushies for young children/pets. You can replace the “safety eyes” with an alternative.)
5 mm Crochet Hook
Stuffing
Scissors
Yarn Needle
Pins & Stitch Markers (Optional)
Base:
The head and body are crocheted as one continuous piece to form the “base.”
Using Brown
R1: 6 SC in a MR (6)
R2: [INC] x 6 (12)
R3: [SC, INC] x 6 (18)
R4-6: 18 SC (18) 3 Rounds
R7: [DEC] x 9 (9)
Note: If your bunny is really small, you may want to attach the eyes now when it’s easier to reach inside of the plushie (instructions are located after R11). However, depending on where you place the eyes, you may need to adjust the placement of the bobbles in R10 and 11 to line up with the eyes.
R8: In FLO, [2 SC, INC] x 3 (12)
R9: [SC, INC] x 6 (18)
R10: 17 SC, Change color to White and make a 4-DcBo (18) Note: If you already placed the eyes, make sure that this bobble is positioned on the back of the bunny and adjust its placement if needed.
Change color to Brown
R11: 2 SC, 3-DcBo, 3 SC, 3-DcBo, 3 SC, 3-DcBo, 3 SC, 3-DcBo, 3 SC (18)
Attach the eyes between R4 and 5 around 3 stitches apart.
Add stuffing and continue stuffing as you go.
R12: [DEC] x 9 (9)
FO leaving a tail for sewing. Finish stuffing.
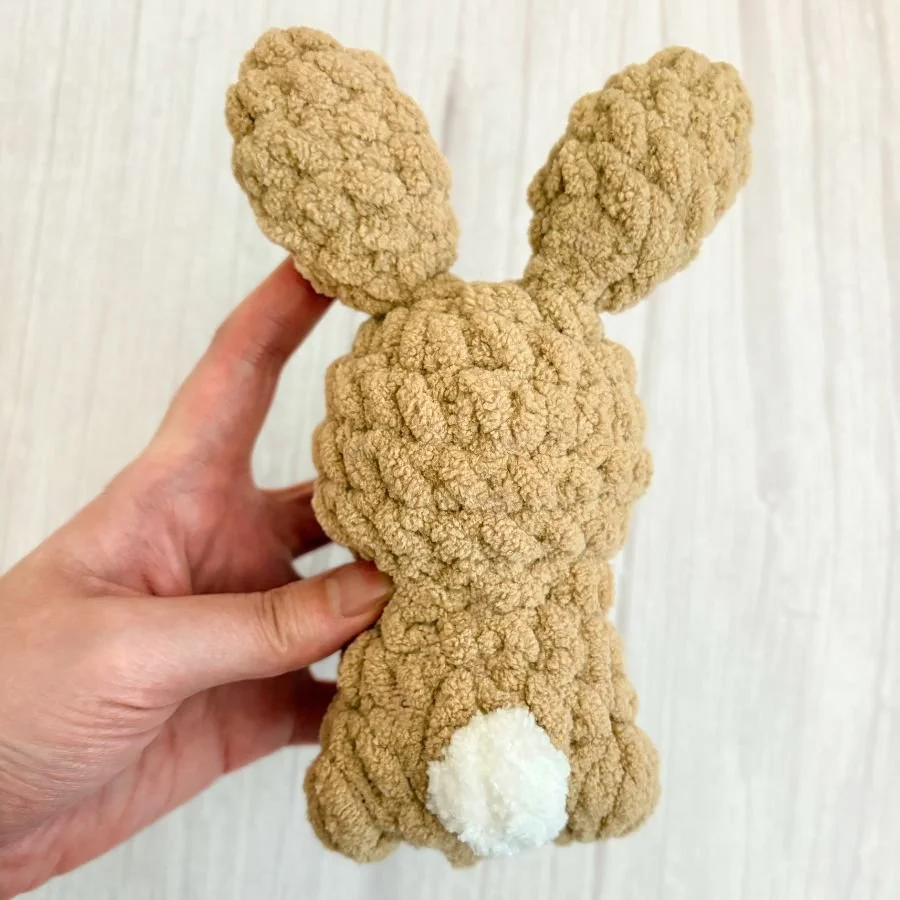
The back view of the bunny!
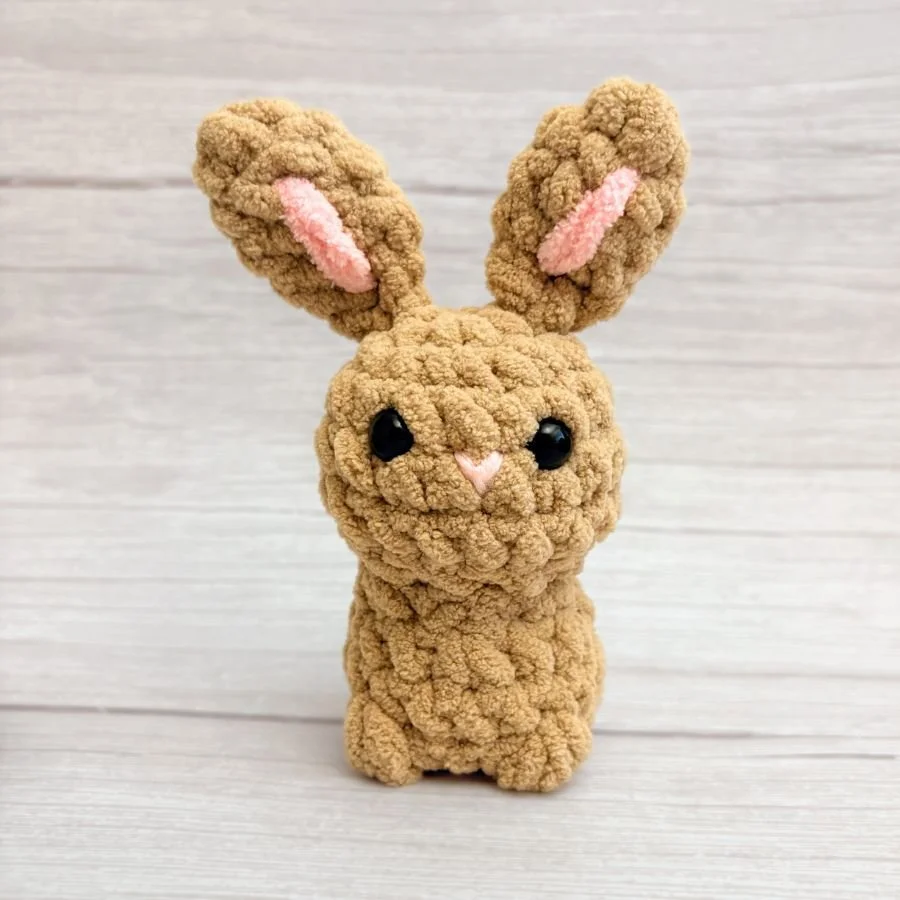
Nose:
Using Pink in #4 Worsted Weight Yarn, embroider a nose onto R5 of the head by sewing a horizontal line between R4 and 5. Exit one round beneath the center of the horizontal line. Then loop the yarn around the horizontal line and pull it halfway down to form a “y” shape.
Ears: (Make 2)
Using Brown
R1: 4 SC in a MR (4)
R2: [INC] x 4 (8)
R3-4: 8 SC (8) 2 Rounds
R5: [2 SC, DEC] x 2 (6)
R6: Fold the stitches in half. Working through the stitches on both sides, make 3 SC (3)
FO leaving a long tail for sewing.
Using Light Pink, embroider pink accents along the middle of the ear by looping the yarn twice around R3 through R5.
Fold the ear in half and sew across the bottom stitches.

Sew the ears onto R2 of the head.
Congratulations! You finished your rabbit!
I love seeing your work! If you post the plushie you made, follow and tag my socials! Instagram, Tik Tok, YouTube: @themaryjay
I hope you enjoyed making this plushie. Please feel free to contact me if you have any questions or if you find any mistakes.
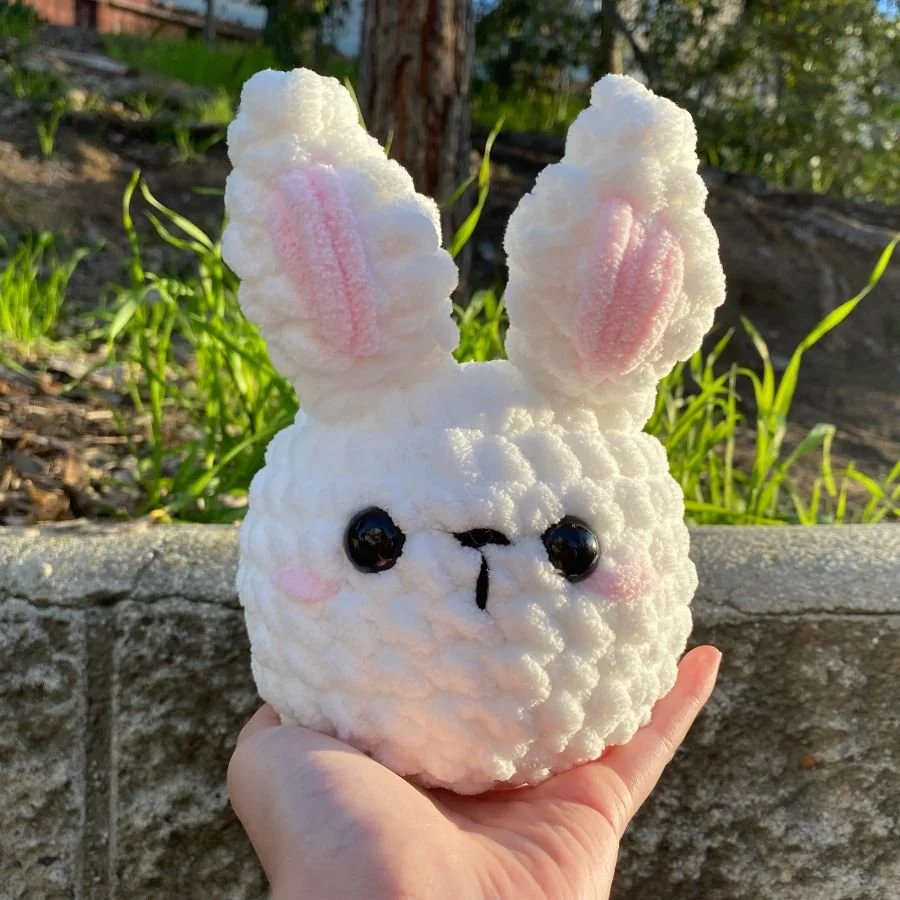
Check out my other bunny patterns!


Find more free patterns here!
You can also find more patterns in my shop or on my Patreon!