
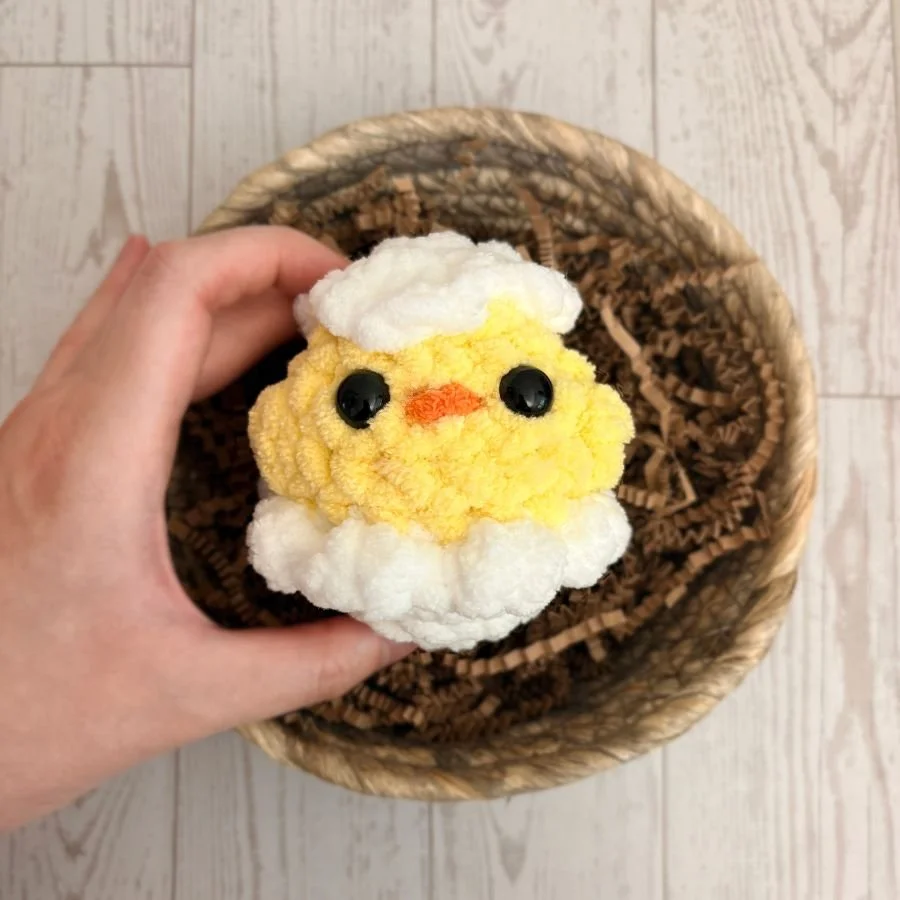
Hatchling Chick Crochet Pattern
Here’s how to crochet a “chick in an eggshell” in around 20 minutes!
Since I released the tiny chick as a free pattern, it only felt right to share a free pattern for this hatchling chick version too.
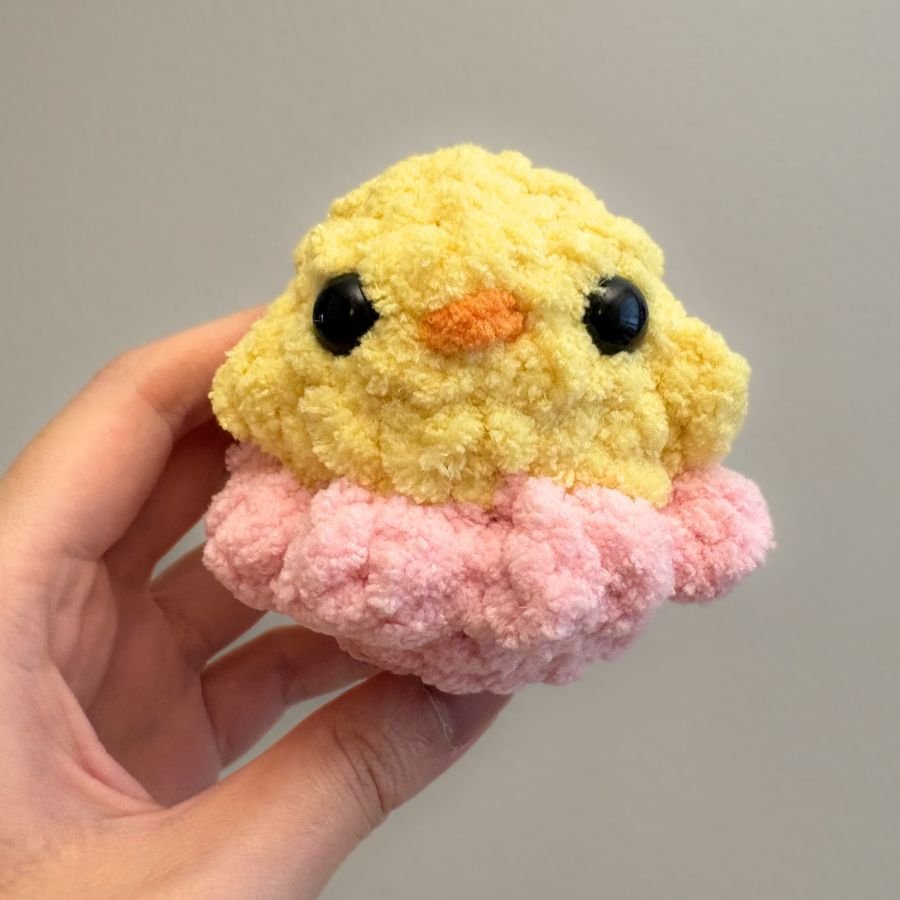
After all, I did design the features of this hatchling chick based off of the original tiny chick. The hatchling chick is a little bit larger, but don’t they still make an adorable pair?
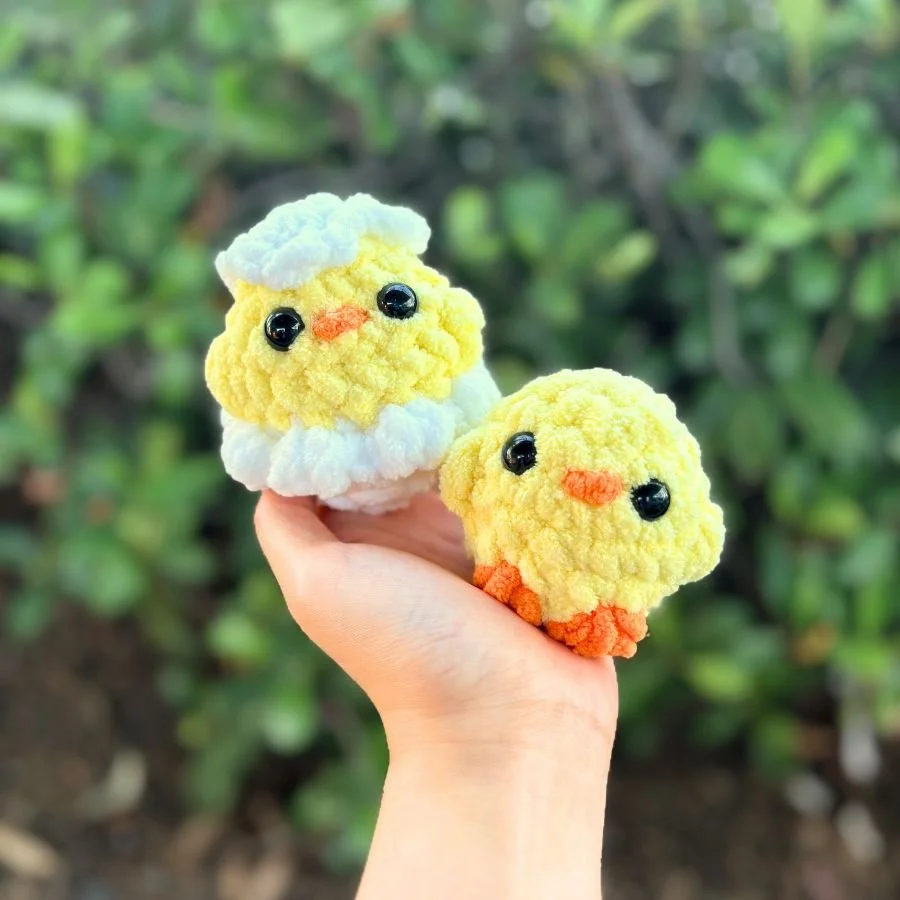
Both the tiny chick and the hatchling chick in this photo are made with variations of Bernat Blanket yarn. p.s. Don’t forget, you can also find the free tiny chick (without the eggshell) crochet pattern here.
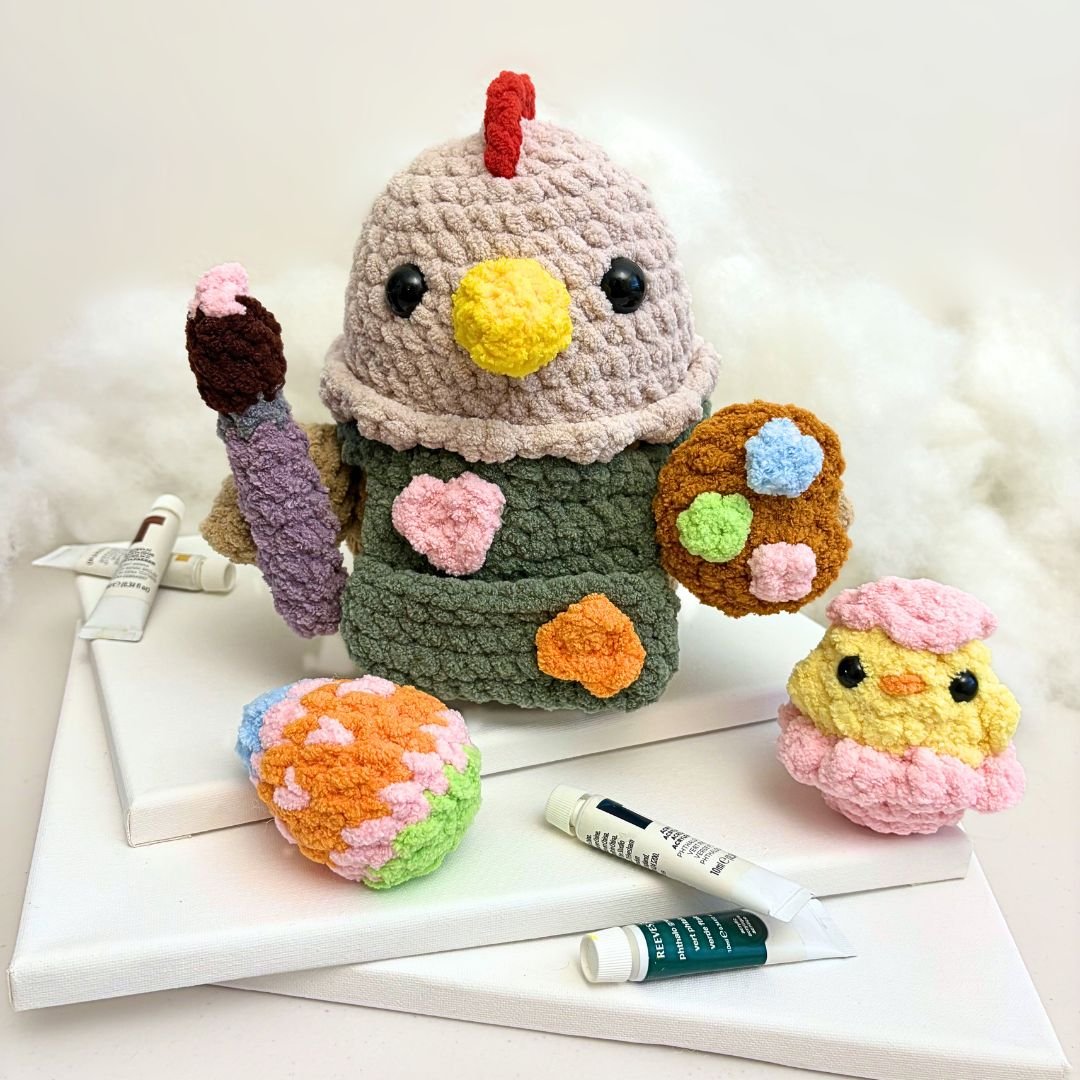
Because this hatchling chick pattern was originally created as an accessory in my painting chicken pattern, keep in mind that some of the reference photos in this pattern feature a pink eggshell instead of white.
Check out the original hatchling chick and the painting chicken who painted its shell pink!
Of course, you can also make the hatchling chick as its own adorable mini project. By itself, it only takes me around 20 minutes to make, although this may vary from crocheter to crocheter.
Let’s get into the hatchling chick pattern!
Terms of Use:
Please do not copy, sell, or duplicate (to distribute) the contents of this crochet pattern in any format without permission. If you’d like to share this pattern, I’d really appreciate if you shared the link or where to find this blog post, as this helps me continue to make free patterns for you!
You are welcome to sell the plushies you make using this pattern, but please give pattern credit to The Mary Jay. Tag me @themaryjay on Instagram, Tik Tok, or YouTube. I’d love to see your work!
Skills and Abbreviations (In U.S. terms)
MR= Magic Ring (Magic Circle)
SC= Single Crochet
SL ST= Slip Stitch
HDC= Half Double Crochet
DC= Double Crochet
CH= Chain
INC= Increase
DEC= Decrease
3-DcBo= 3-Double Crochet Bobble (a bobble made with three partial double crochets)
R= Round/Row
FO= Fasten off (recommended alternative: Invisible Fasten Off)
Standing Single Crochet= A single crochet made by starting with a slip knot on your hook. Then insert your hook into the indicated stitch and complete the single crochet as usual.
Change Color & Slip Knot
Recommended Materials:
(Based on what I used to make the chick in the sample photos)
Super Bulky Weight Yarn (#6) in Yellow, Orange, and the eggshell color of your choice (I used white or pink for the eggshells in my photos.)
Two 12 mm Safety Eyes (Warning: Safety eyes can be choking hazards and are generally not recommended when crocheting plushies for young children/pets. You can replace the “safety eyes” with an alternative.)
5 mm Crochet Hook
Stuffing
Scissors
Yarn Needle
Pins & Stitch Markers (Optional)
Bottom Eggshell & Chick:
The bottom eggshell and the chick are crocheted as one continuous piece.
Using the Eggshell Color
R1: 6 SC in a MR (6)
R2: [INC] x 6 (12)
R3: [5 SC, INC] x 2 (14)
R4: [6 SC, INC] x 2 (16)
R5: 16 SC (16)
Tip: Place a stitch marker in the first back loop of R5 to mark it for later.
R6: In FLO, [Dc Inc, SL ST] x 8 (24)
Invisible FO or SL ST and FO. Weave in ends.
In the next round (R7), crochet the chick onto the shell by starting with a standing single crochet. To do this, begin with a slip knot on your hook using Light Yellow. Insert your hook into the first back loop of R5 (where we placed the stitch marker - you can also find a picture reference below) and make the first SC of the round. Continue crocheting the rest of the round as usual.
R7: In BLO of R5, 16 SC (16)
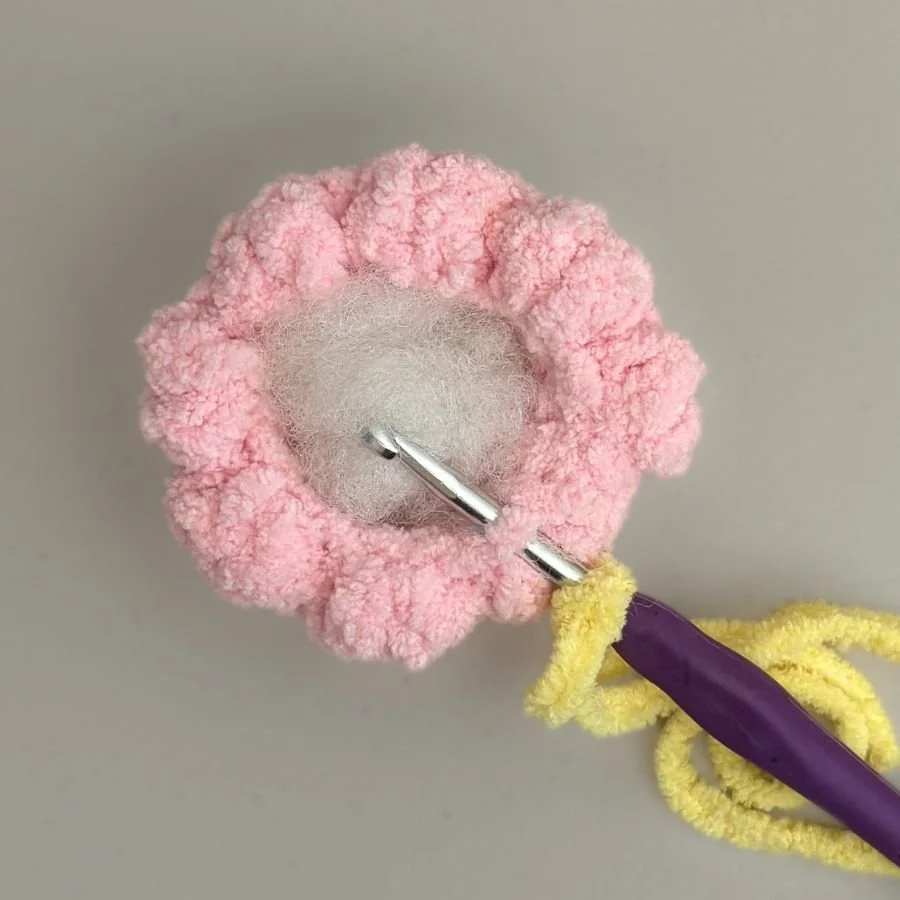
R7 (Picture Reference): Where to insert the hook into the eggshell to start off the round and make the first single crochet (aka standing single crochet).
Add stuffing and continue stuffing as you go.
R8: 4 SC, 3-DcBo, 6 SC, 3-DcBo, 4 SC (16)
R9: 16 SC (16)
R10: [2 SC, DEC] x 4 (12)
Attach the eyes between R9 and 10 around 4 stitches apart.
R11: [DEC] x 6 (6)
FO leaving a tail for sewing. Finish stuffing.
Use the yarn tail to sew the plushie closed.
Using Orange, embroider the beak between R9 and 10 between the eyes.
(Picture Reference): Crochet hatchling chick before adding the top eggshell.
Top Eggshell:
Using the Eggshell Color
R1: 6 SC in a MR (6)
R2: [CH 1,
In one stitch: HDC, DC, HDC, CH 1
In the next stitch: SL ST]
Repeat the part in [ ] two more times for three times total (18)
FO leaving a long tail for sewing.
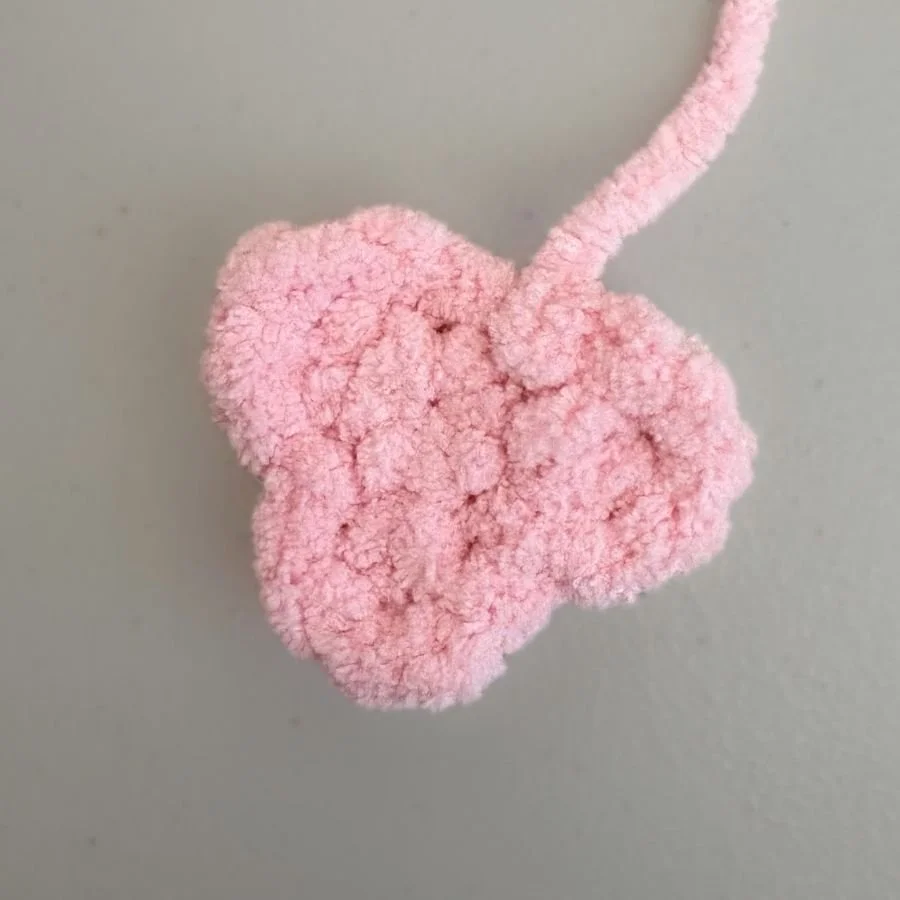
(Picture Reference): Top Eggshell
Sew the top eggshell onto the top of the chick.
Congratulations! You finished your hatchling chick!
I love seeing your work! If you post the plushie you made, follow and tag my socials! Instagram, Tik Tok, YouTube: @themaryjay
I hope you enjoyed making this plushie. Please feel free to contact me if you have any questions or if you find any mistakes.
Make the matching little chick!

Find the no sew little chick pattern here!
Find more free patterns here!
You can also find more patterns in my shop or on my Patreon!