
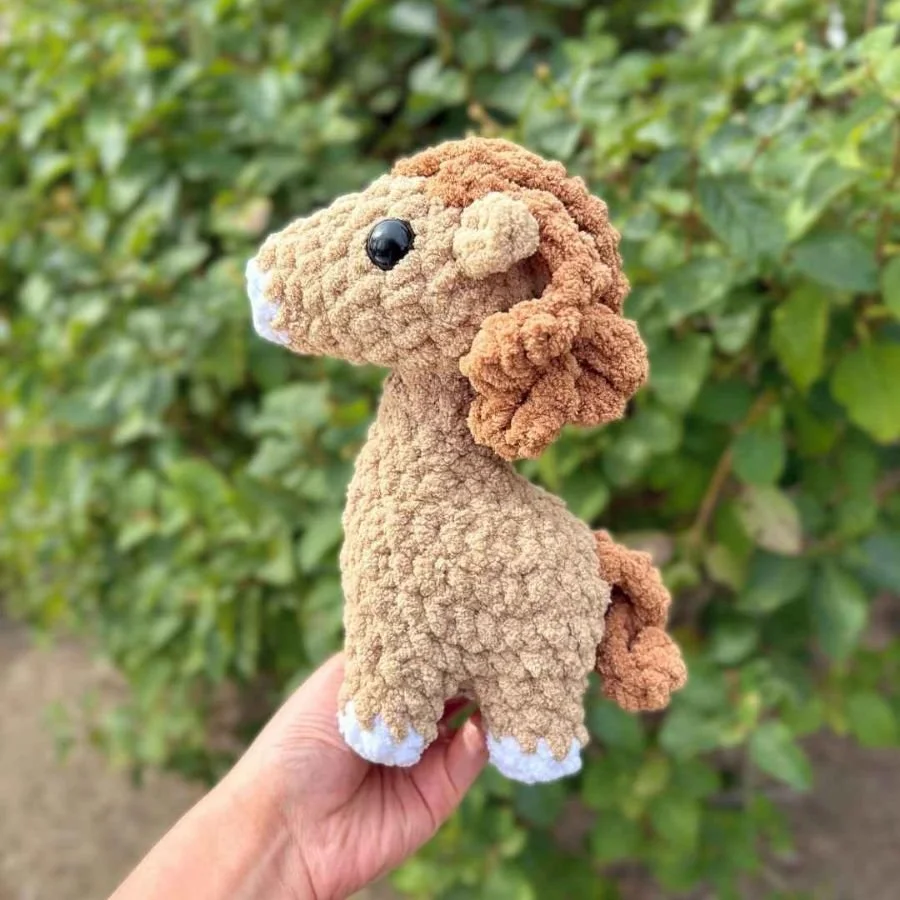
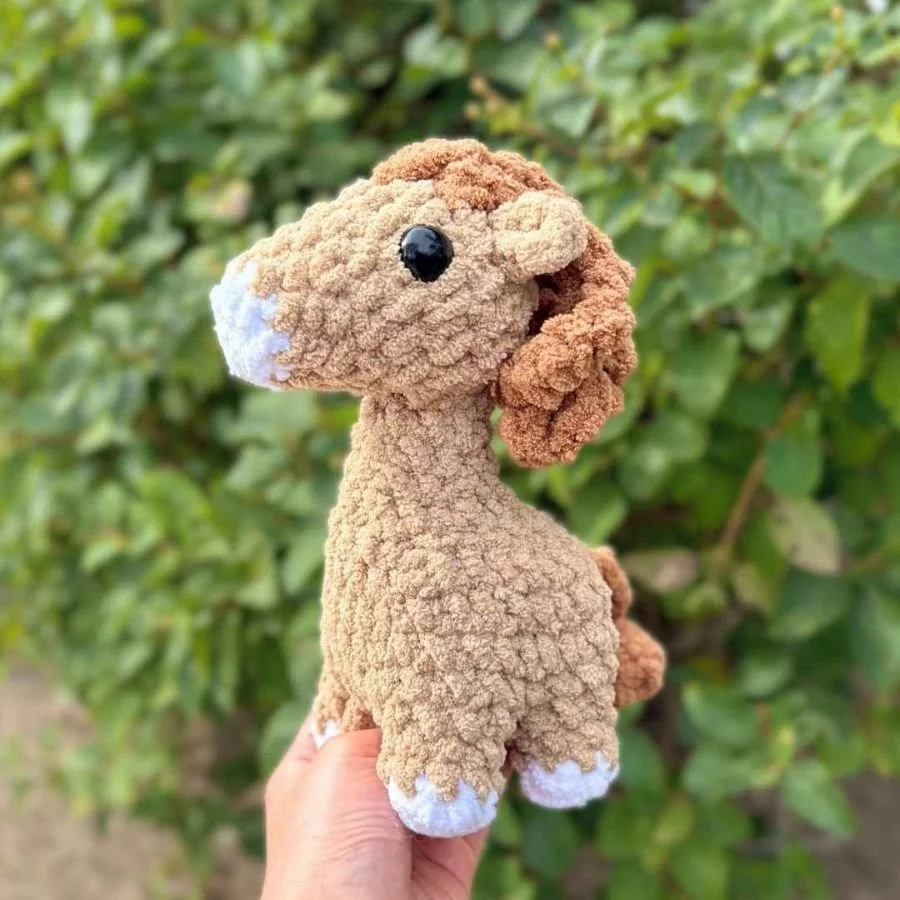
“Noodles the Horse” Crochet Pattern
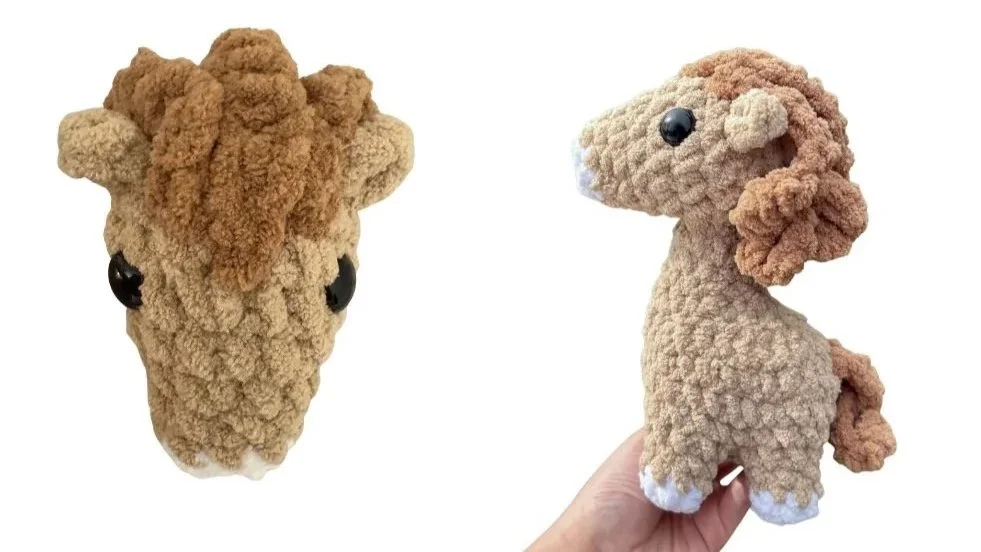
Here’s how to crochet a little horse!
Horses were my first favorite animal. As a kid, I probably had over a dozen toy horses, and this piece felt especially nostalgic because it reminds me of them.
Even though I’ve wanted to design a horse for a while, I decided to wait until this year because 2026 is the Year of the Horse!
What better way to celebrate than by crocheting one?
Shout out to @flowercatcrochet for suggesting the name: Noodles! It felt like the perfect name to match the food names of my previous zodiac patterns, “ Bao the Bunny” and “Matcha the Snake.” Plus, the horse’s mane and tail . . . does in fact, kind of remind me of “noodles!”
So let’s get into the pattern!
You can find the free written pattern below or purchase the PDF version of this crochet pattern on my Patreon. It’s also included with a Tier 2 or Tier 3 Patreon membership. Join my Patreon!
I designed this pattern to be crocheted in continuous rounds (or spirals) unless otherwise noted.
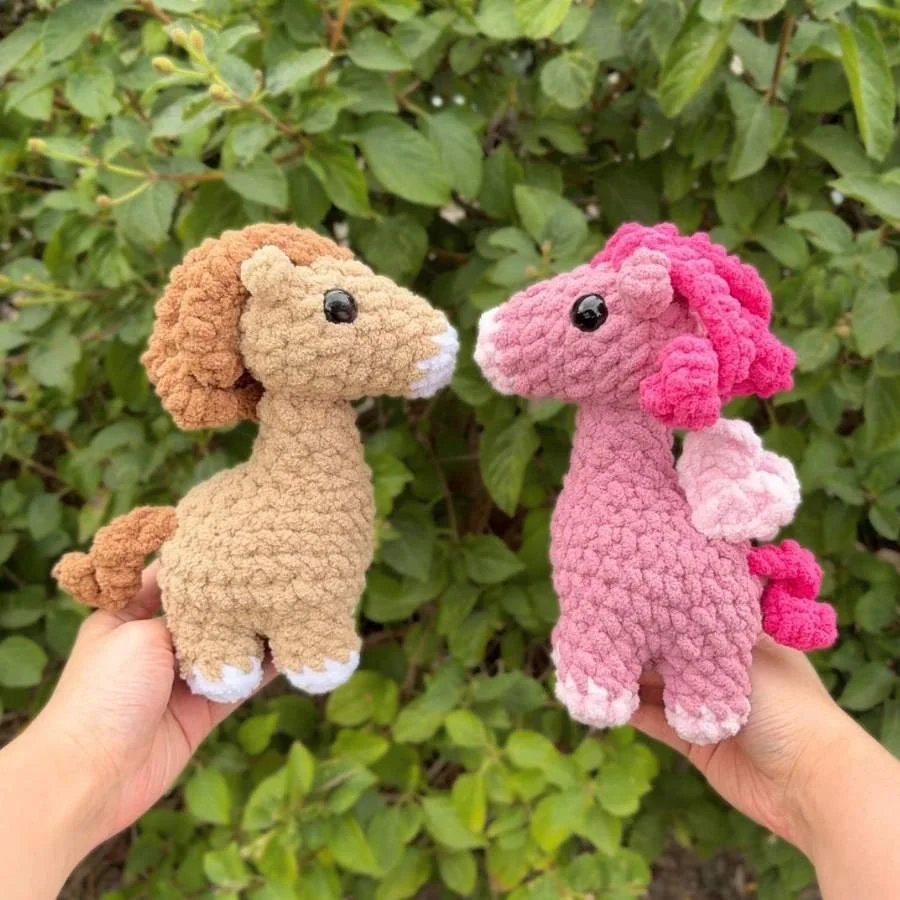
It’s been tested by five testers with various yarn and hook sizes! Most of them said that this horse took them around two hours to crochet, except one tester was able to crochet it in around an hour.
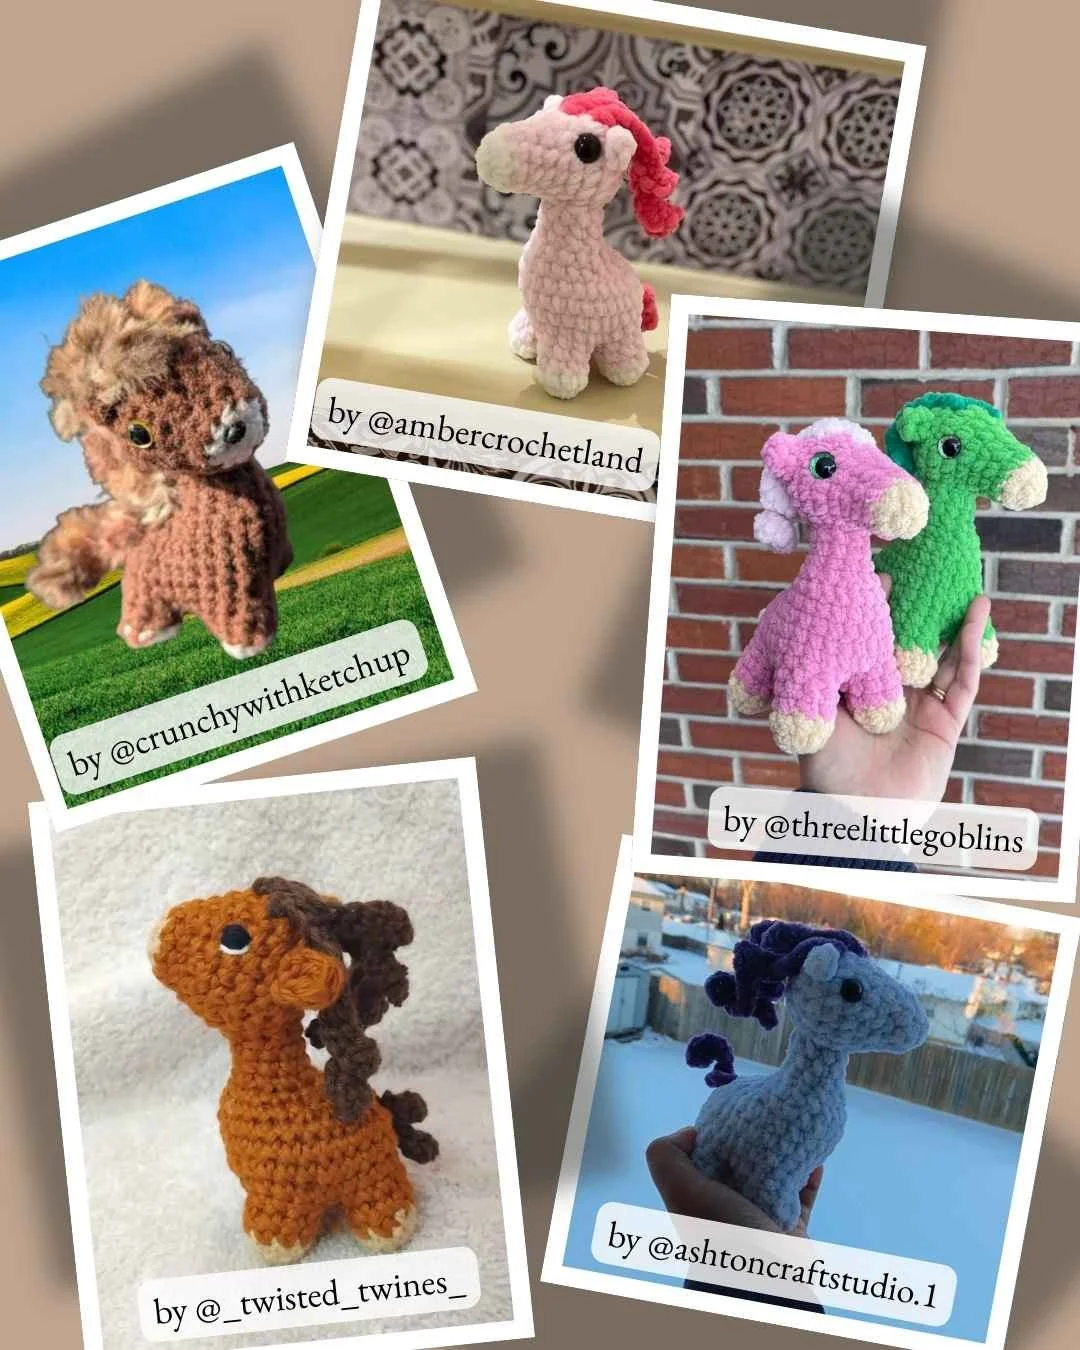
Check out the horses they made and find these crocheters on Instagram.
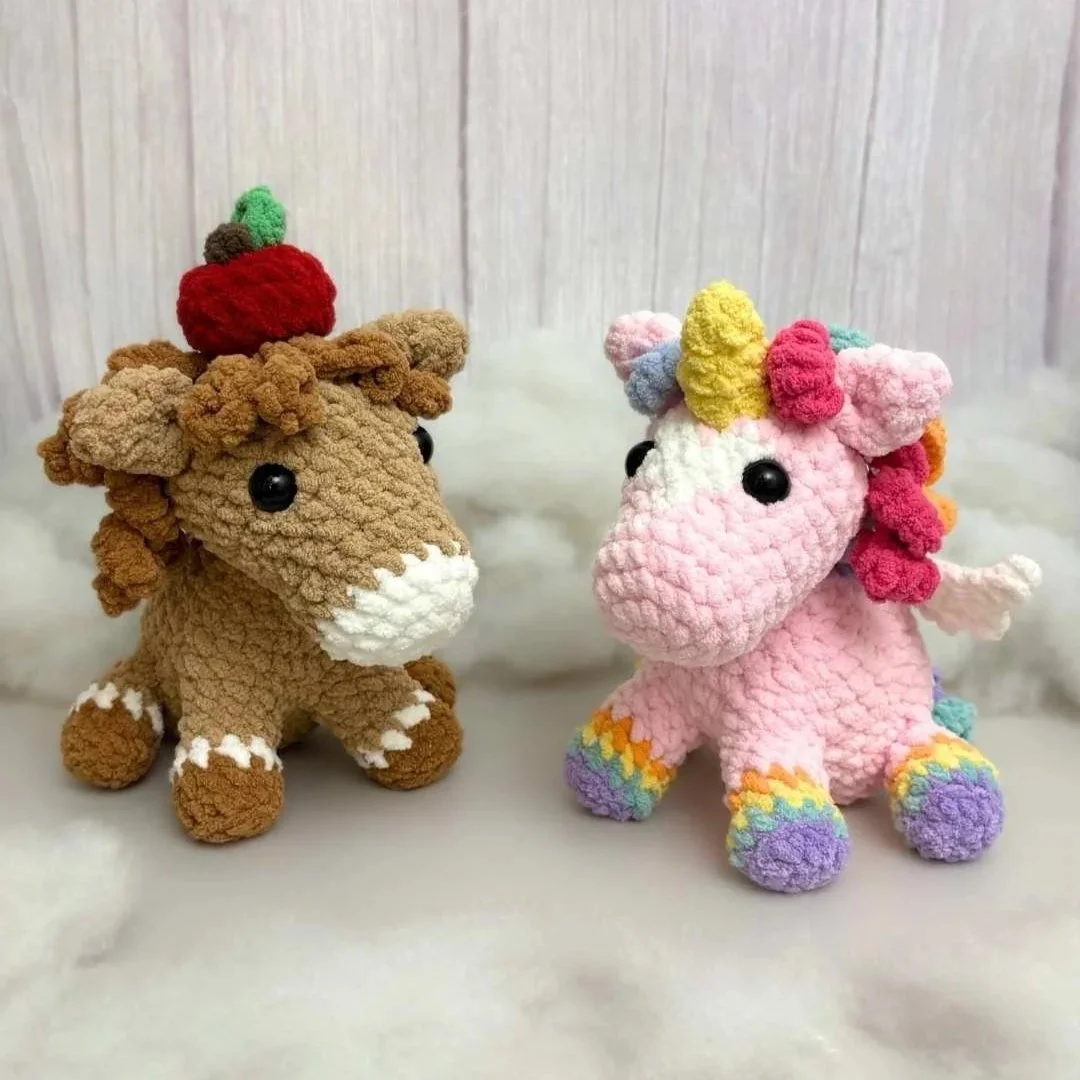
You can also turn your horse into a pegasus!
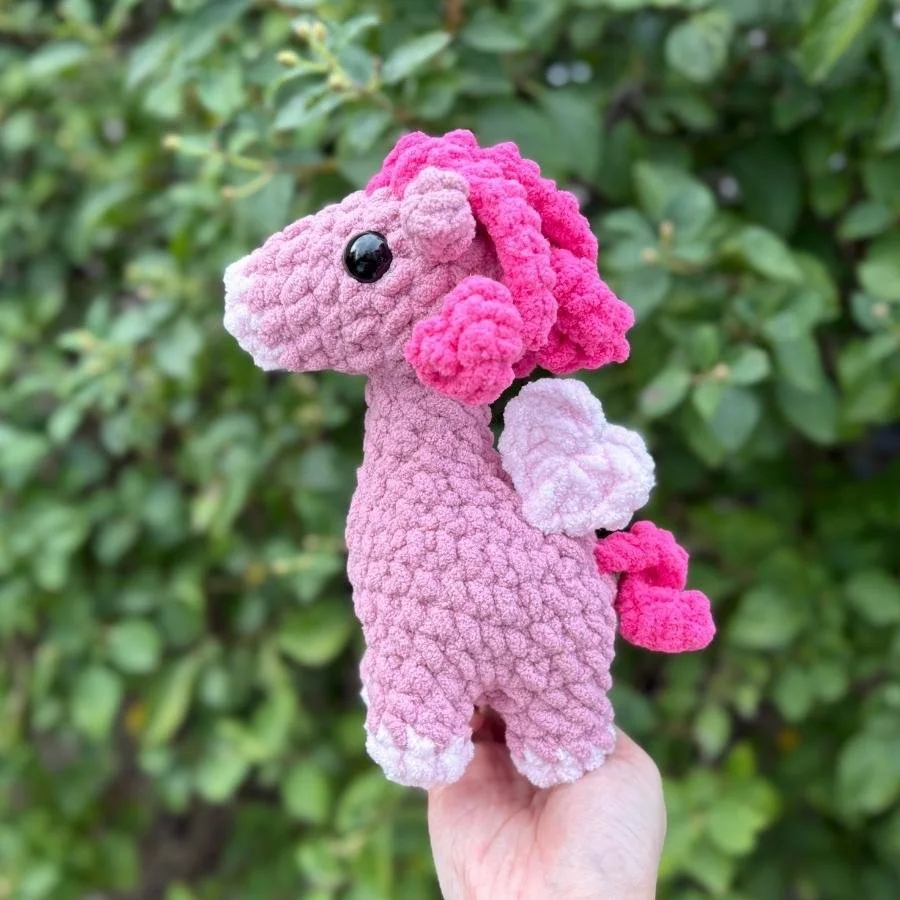
With Valentines Day and Lunar New Year in the same month, I couldn’t help but combine them both to make a heart-winged pegasus! You can find how to add heart-shaped wings to your horse with this pegasus mod guide here. The rest of the pegasus is made in the same way as the horse.
Here’s the horse pattern:
Terms of Use:
Please do not copy, sell, or duplicate (to distribute) the contents of this crochet pattern in any format without permission. If you’d like to share this pattern, I’d really appreciate it if you shared the link or where to find this blog post, as this helps me continue to make free patterns for you!
You are welcome to sell the plushies you make using this pattern, but please give pattern credit to The Mary Jay. Tag me @themaryjay on Instagram, Tik Tok, or YouTube. I’d love to see your work!
Skills and Abbreviations (In U.S. terms)
MR= Magic Ring (Magic Circle)
SC= Single Crochet
SL ST= Slip Stitch
DC= Double Crochet
INC= Increase
DEC= Decrease
CH= Chain
R= Round/Row
FO= Fasten off
Change Color
Recommended Materials:
(Based on what I used to make the horse in the sample photos)
Super Bulky Weight Yarn (#6) in in White and two shades of Brown (I used around 38 yards of Premier Basix Chenille Brights in the main color.)
Two 16 mm Safety Eyes (Warning: Safety eyes can be choking hazards and are generally not recommended when crocheting plushies for young children/pets. You can replace the “safety eyes” with an alternative.)
5 mm Crochet Hook
Stuffing
Scissors
Yarn Needle
Pins & Stitch Markers (Optional)
-
You can find most of these items in a craft store, sometimes in places like Walmart, or on my Amazon Storefront. My Amazon Storefront contains my own personal favorites to use! It’s an affiliate link, which means I will earn a small commission at no extra cost to you if you use it to make a purchase. This is an additional way that helps support me and lets me continue to make free content for you.
For this horse, I used Premier Basix Chenille Brights yarn (this is also an affiliate link). I believe the yarn color names are Steel Cut Oats, Caramel, and White
-
Yes! The above yarn sizes and hook size are recommendations based on what I used to make the plushie in the sample photo. Feel free to switch up the yarn or hook size based on what you have available or your preference.
If you are using a different yarn or hook size, don’t forget to make sure that the yarn and hook size work well together. For amigurumi, it’s often recommended to use a hook size that is at least 1-2mm smaller than the recommended hook size on the yarn label for tighter stitches and less holes in your project. However, different crocheters have their own preferences on hook size and you are welcome to follow your own preference.
Please note that the plushie may vary in size with different yarn and hook sizes.
-
Yes! Just like the yarn and hook size, the safety eyes listed are just what I used to make the plushie in the sample photo. Feel free to use a similar eye size or switch it up with felt, buttons, or even just embroider it with yarn.
Please note that safety eyes can be choking hazards and are not recommended for plushies made for young children or pets.
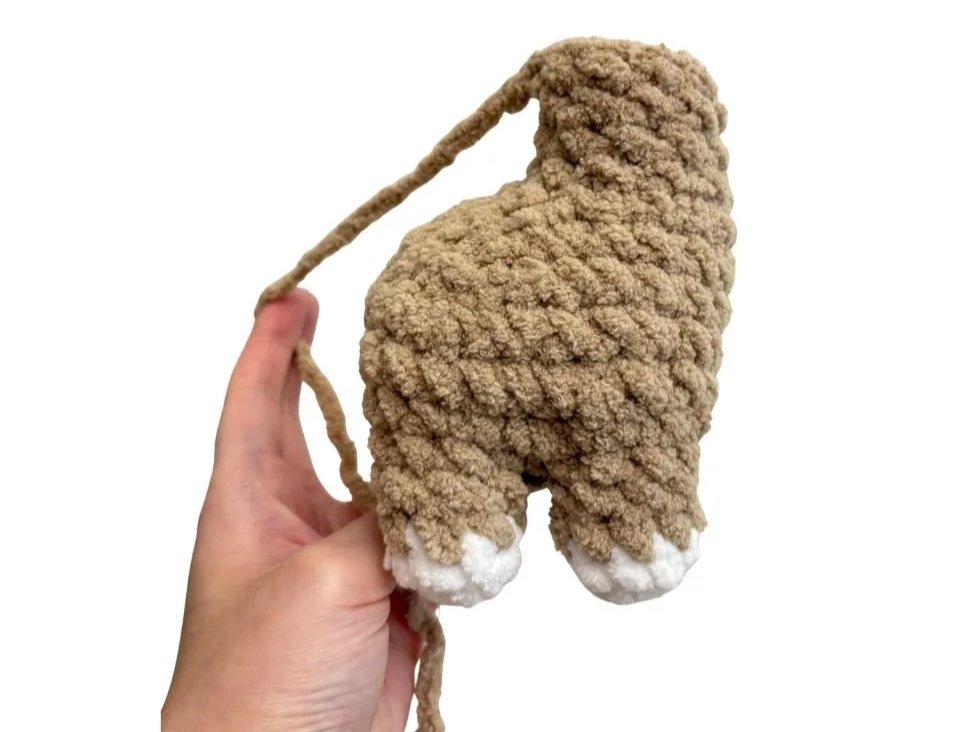
Legs (Make 4)
Using White
R1: 8 SC in a MR (8)
R2: 8 SC (8)
Change Color to Brown
R3-4: 8 SC (8) 2 Rounds
FO leaving a tail.
Hide the tail inside or you can use it to help sew closed any gaps between the legs and the body later. We’ll be attaching the legs during R2 of the body.

Body
Using Brown
R1: 12 SC in a MR (12)
R2: 1 SC,
We’ll now be attaching the legs to the body. When indicated, line up the first and last stitch of each leg to the next two stitches of the body. Insert the hook from the inside to the outside of the leg and then through the body before SC them together. The rest of the stitches are crocheted just like normal along the round of the body. Note: According to a left-handed tester, left-handed crocheters may need to insert the hook from the outside of the leg to the inside instead.
Working through the first leg and body: 2 SC
Continue working in the body only: 1 SC
Working through the second leg and body: 2 SC
Continue working in the body only: 1 SC
Working through the third leg and body: 2 SC
Continue working in the body only: 1 SC
Working through the fourth leg and body: 2 SC (12)
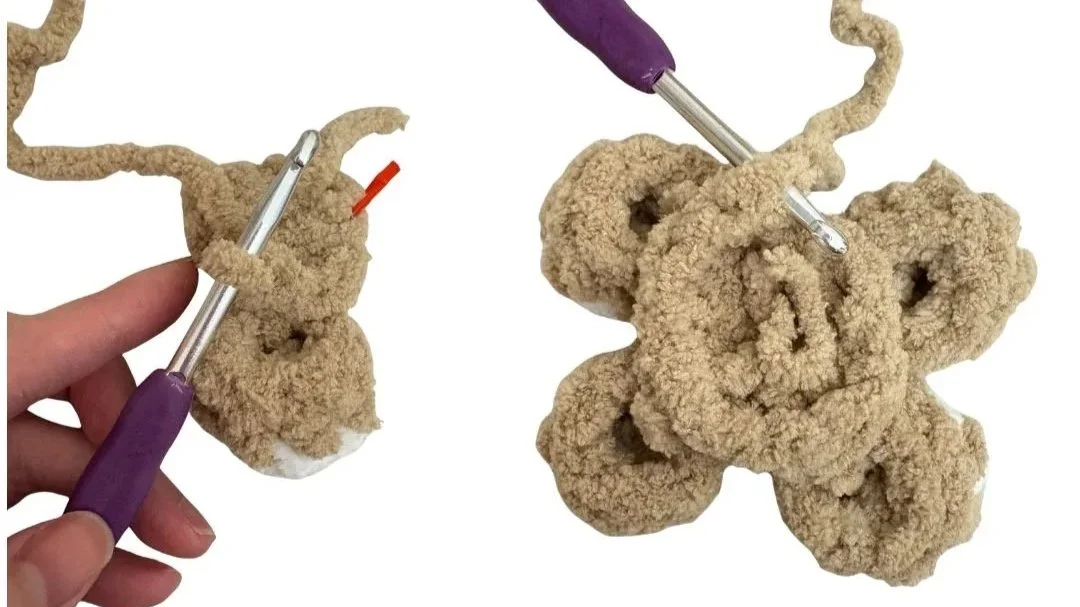
R2 (Picture Reference): Crocheting the legs to the body.
We’ll now be crocheting along the outside of the legs, ignoring the stitches that connected the legs to the body.
R3: 1 SC, 6 SC (around the outside of the leg), 1 SC, 6 SC (around the outside of the leg), 1 SC, 6 SC (around the outside of the leg), 1 SC, 6 SC (around the outside of the leg) (28)
R4: [13 SC, INC] x 2 (30)
R5-6: 30 SC (30) 2 Rounds
Add stuffing to the legs. If there’s still little gaps between the legs and the body, use the leftover yarn from fastening off the legs to sew the gaps closed.
Continue stuffing as you go.
In R7-9, the decreases (DEC) should be centered to the back of your horse. Sometimes stitches shift differently for different crocheters, so double check and if needed, adjust the placement of the decreases to line up with your horse.
As a guideline: For R7 and 8, the decreases should start 6 stitches away from the center of the back. For R9, the decrease should start 3 stitches away from the center of the back.
R7: 11 SC, 6 DEC, 7 SC (24)
R8: 9 SC, 6 DEC, 3 SC (18)
R9: 9 SC, 3 DEC, 3 SC (15)
R10: [SC, DEC] x 5 (10)
R11-13: 10 SC (10) 3 Rounds
FO leaving a long tail for sewing. Finish stuffing.
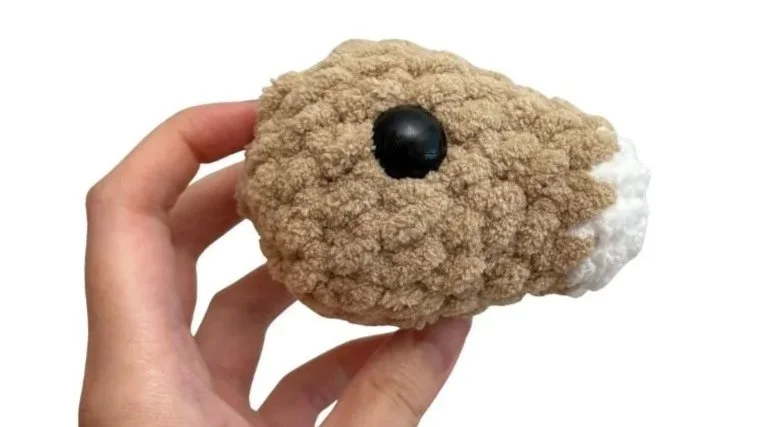
Head
Using White
R1: 5 SC in a MR (5)
R2: [INC] x 5 (10)
Change Color to Brown
R3-4: 10 SC (10) 2 Rounds
R5: [SC, INC] x 5 (15)
R6: 15 SC (15)
R7: [2 SC, INC] x 5 (20)
R8-9: 20 SC (20) 2 Rounds
R10: [2 SC, DEC] x 5 (15)
Attach the eyes between R7-8 around 7 stitches apart along the topside of the head.
Add stuffing and continue stuffing as you go.
R11: [SC, DEC] x 5 (10)
R12: [DEC] x 5 (5)
FO leaving a long tail for sewing. Finish stuffing.
Use the yarn tail to sew the plushie closed.
Ears (Make 2)
Using Brown
R1: In a MR, SL ST, SC, DC, SC, SL ST (5)
FO leaving a long tail for sewing.
Fold the ear in half and sew across the bottom. Leave the rest of the yarn tail to sew the ear onto the head later.
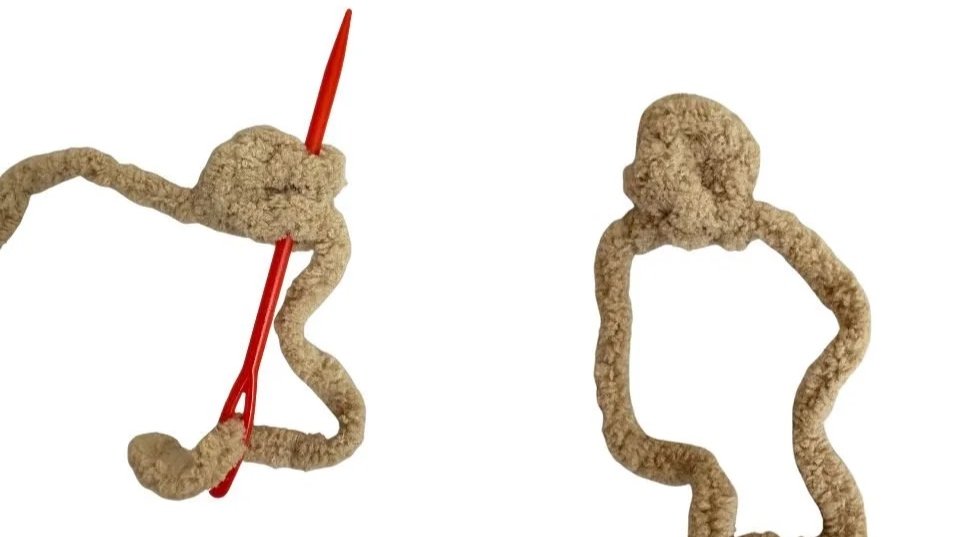
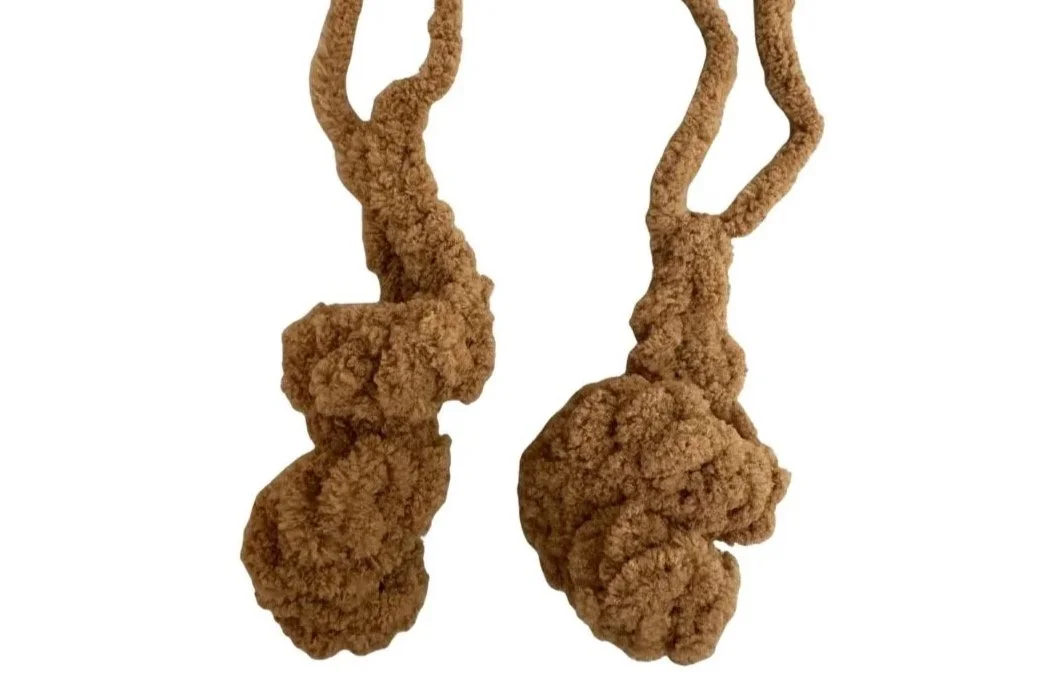
Mane
Using Darker Brown
Middle Strand:
CH 20
Starting in the second chain from the hook: 3 SC, [2 INC, 3 SC] x 2, 3 SC, 3 SL ST (23)
FO leaving a long tail for sewing.
Side Strands: (Make 2)
CH 19
Starting in the second chain from the hook: 3 SC, [2 INC, 3 SC] x 2, 2 SC, 3 SL ST (22)
FO leaving a long tail for sewing.
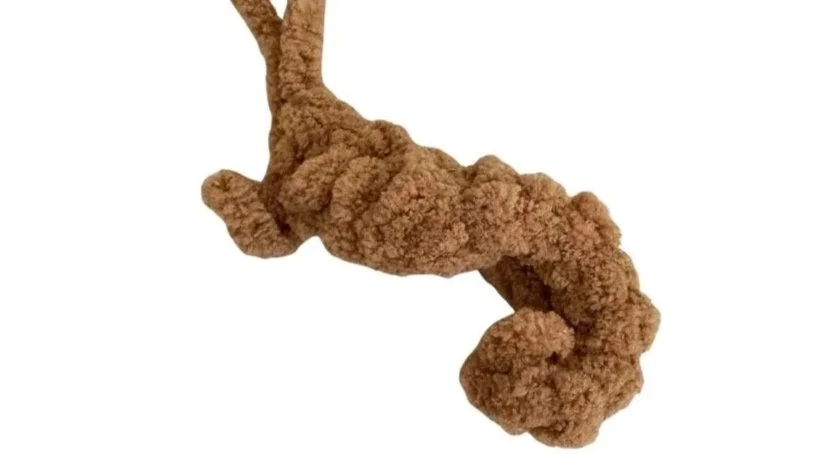
Tail
Using Darker Brown
CH 10
Starting in the second chain from the hook: SC, 2 INC, 3 SC, 2 INC, SC (13)
FO leaving a long tail for sewing.
Assembly
Optional: Use pins to hold the pieces in place to help with the placement.
Ears:
Sew the ears between R9-10 of the head and roughly lined up to the placement of the eyes.
Head:
Sew R7 through R10 of the head to the top of the neck.
Tail:
Sew the tail to the back of the horse between R6-7 of the body. Remember to count the rounds starting from the belly and not the legs.
Mane:
First, sew the middle strand starting between R7-8 of the head. To help the strand lay flatter against the head, sew down a few extra stitches between the front of the strand and the ear. Then sew the side strands starting between R8-9, slightly tilted and leaning against the middle strand. Also, sew down a few extra stitches moving from the front of the strands to the ears.
Congratulations! You finished your horse! Thank you so much for following along with my pattern.
If you wanted to turn your horse into a pegasus, don’t forget that you can find the heart-wing mod guide here.
Want to make another horse?
I love seeing your work! If you post the plushie you made, follow and tag my socials! Instagram, Tik Tok, YouTube: @themaryjay
I hope you enjoyed making this plushie. Please feel free to contact me if you have any questions or if you find any mistakes.
Ready for your next project? Find more free patterns here!
You can also find more patterns in my shop or on my Patreon!