
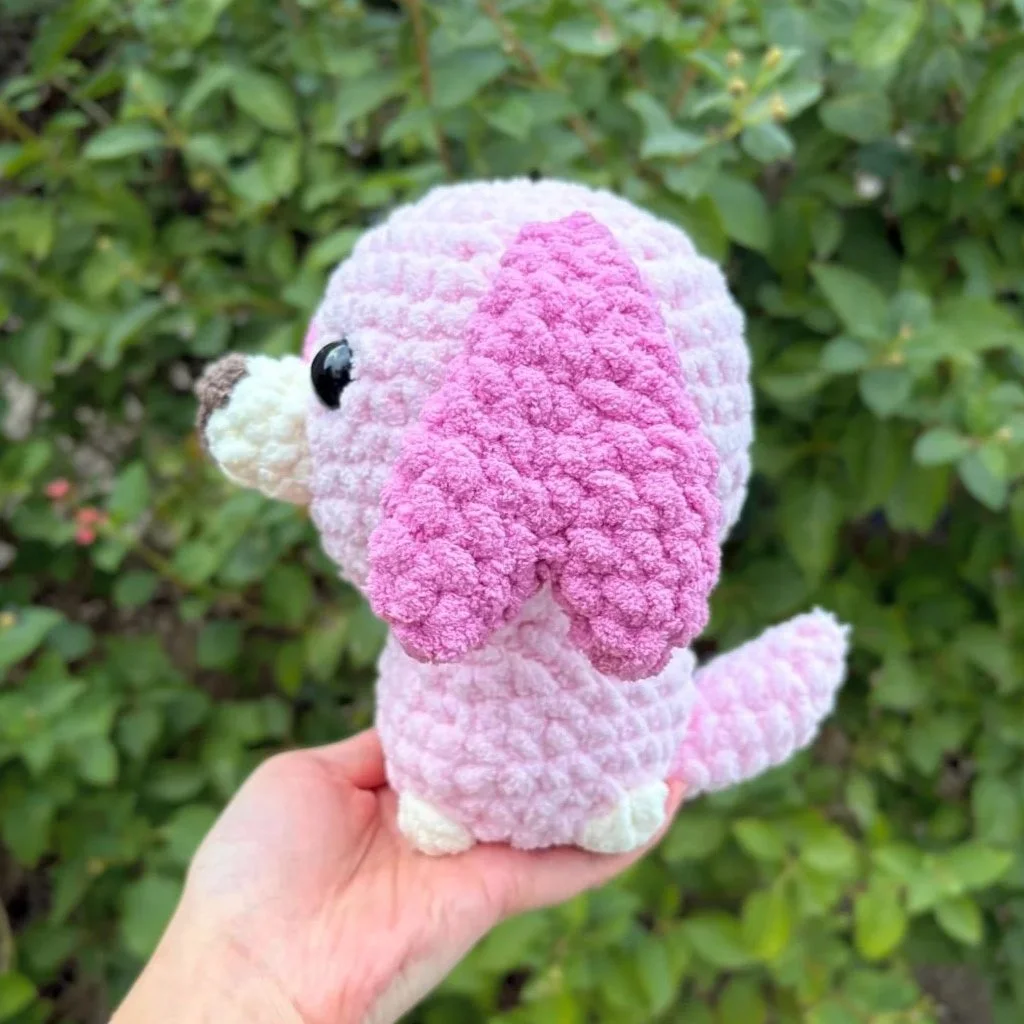
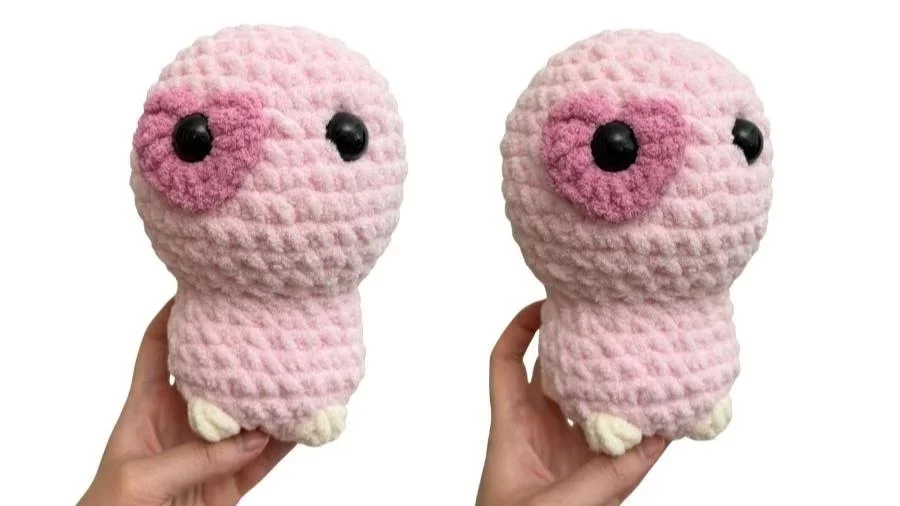
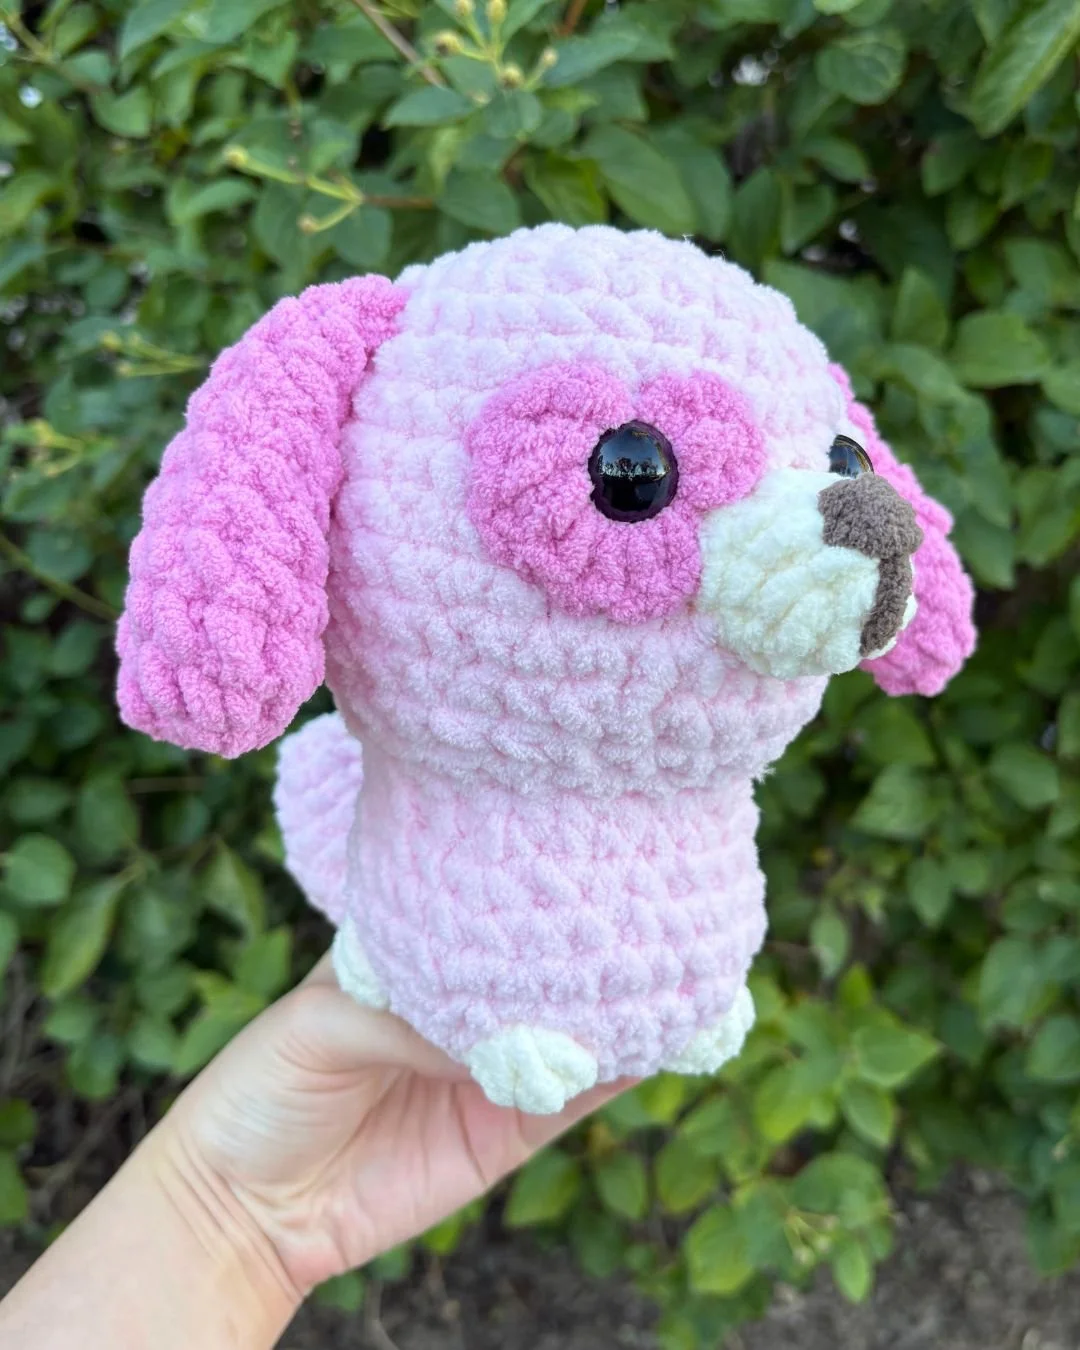
“Puppy Love” Valentines Dog Pattern
With heart-shaped ears and a heart-shaped patch, you could say this ‘puppy love’ dog is full of heart!
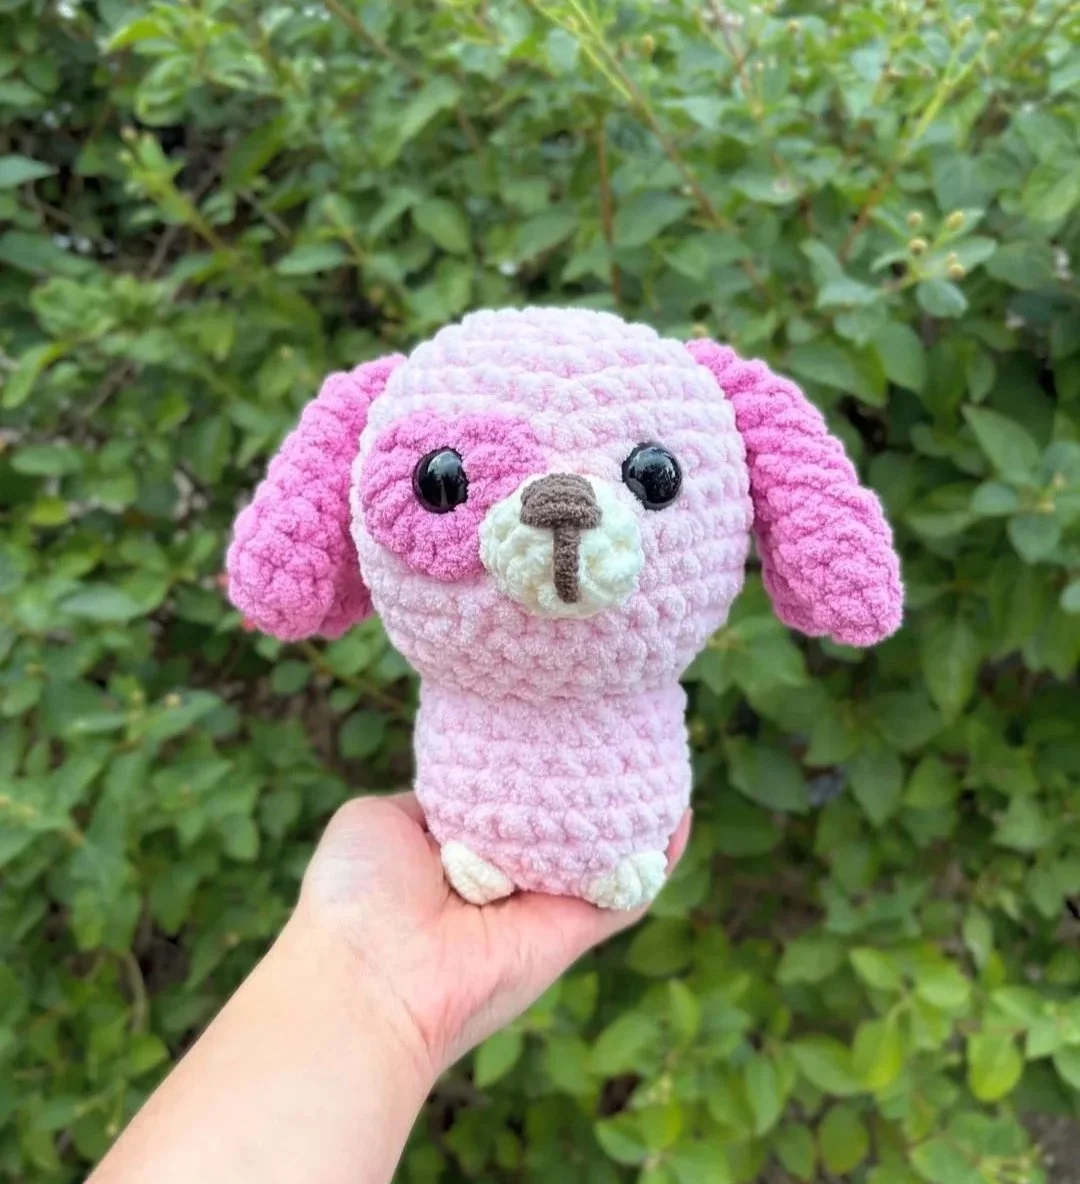
This puppy makes a cute, heartfelt amigurumi project for Valentines Day or as a gift for a loved one. It’s also relatively quick to make and can be crocheted in just a couple hours. Here’s how to crochet this dog!
p.s. Check out the heart-shaped ears!
Let’s get into the pattern!
This pattern is designed to be crocheted in continuous rounds (or spirals) unless otherwise mentioned. You can find the free pattern below or you can also find a PDF version of this pattern on my Patreon.
This pattern has been tested by 9 crocheters. Check out the dogs they made below!
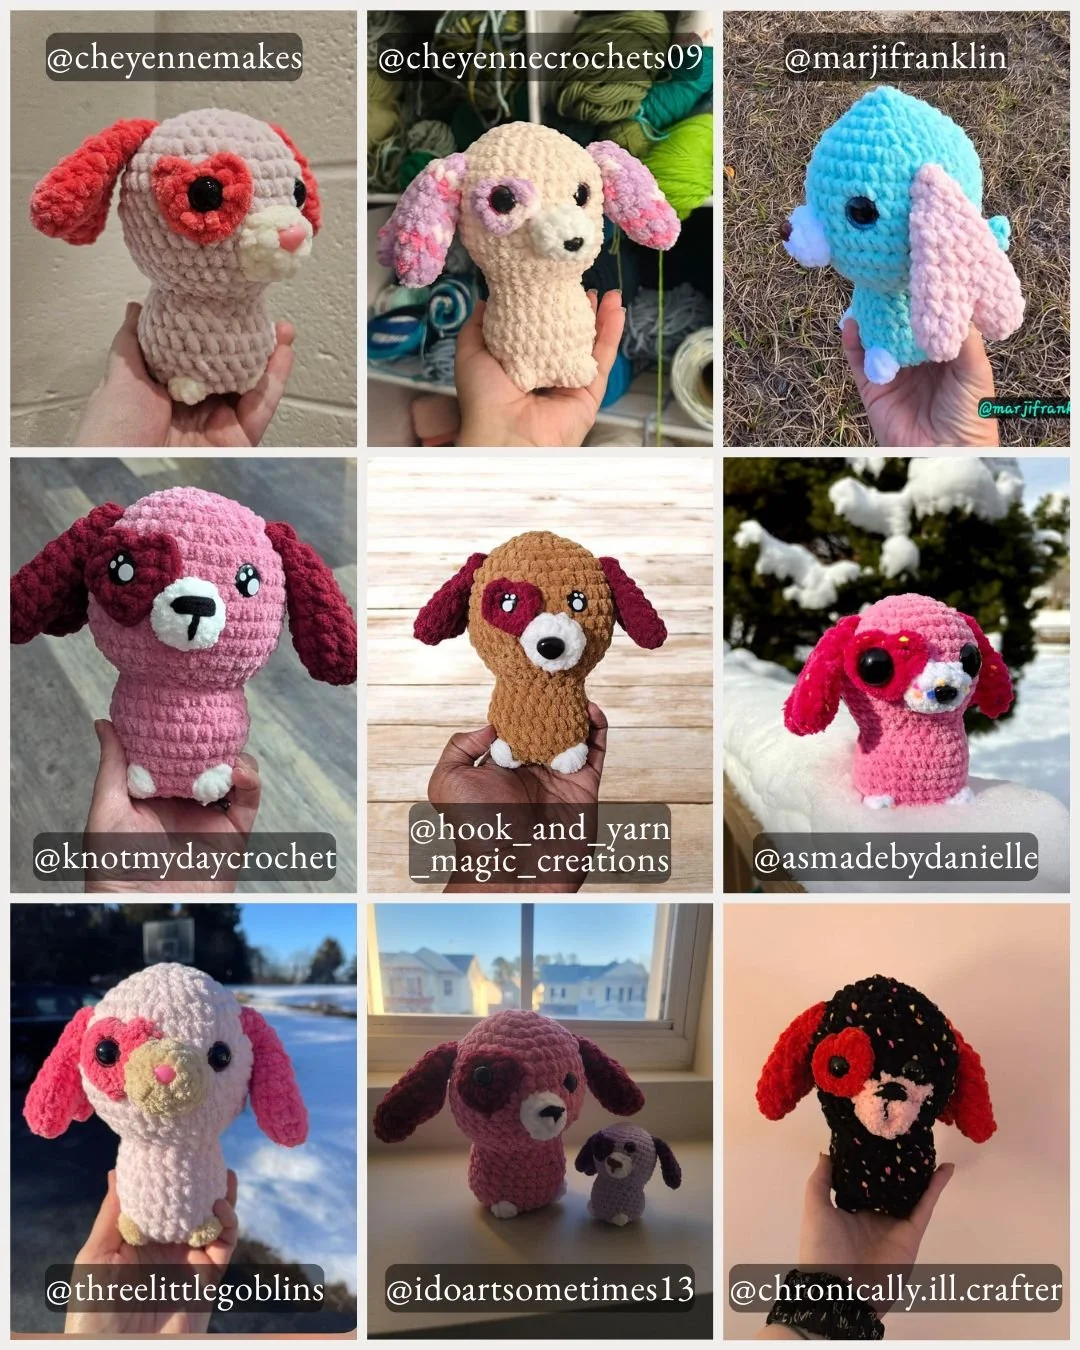
The 9 puppies that my testers made with this pattern! You can find these crocheters on Instagram.
Terms of Use:
Please do not copy, sell, or duplicate (to distribute) the contents of this crochet pattern in any format without permission. If you’d like to share this pattern, I’d really appreciate it if you could share where to find this blog post as this helps me continue to make free patterns for you!
You may sell the plushies you make using my patterns, but please give pattern credit to The Mary Jay and link back to this post whenever possible. What you do with the finished plushies you make is solely your responsibility.
Skills and Abbreviations (In U.S. terms)
MR= Magic Ring (Magic Circle)
SC= Single Crochet
SL ST= Slip Stitch
HDC= Half Double Crochet
DC= Double Crochet
INC= Increase
DEC= Decrease
FLO= Front Loop Only
CH= Chain
R= Round/Row
5-DcBo= 5 double crochet bobble (a bobble made by crocheting 5 partial double crochets together in one stitch)
FO= Fasten off
Change Color
Recommended Materials:
(Based on what I used to make the puppy in the sample photos)
Super Bulky Weight Yarn (#6) in Brown, Cream, and two shades of Pink
Two 18 mm Safety Eyes (Warning: Safety eyes can be choking hazards and are generally not recommended when crocheting plushies for young children/pets. You can replace the “safety eyes” with an alternative.)
5 mm Crochet Hook
Stuffing
Scissors
Yarn Needle
Pins & Stitch Markers (Optional)
-
You can find most of these items in a craft store, sometimes in places like Walmart, or on my Amazon Storefront. My Amazon Storefront contains my own personal favorites to use! It’s an affiliate link, which means I will earn a small commission at no extra cost to you if you use it to make a purchase. This is an additional way that helps support me and lets me continue to make free content for you.
For the Valentines Dog, I used Bernat Blanket that you can find at Yarnspirations.
-
Yes! The above yarn sizes and hook size are recommendations based on what I used to make the plushie in the sample photo. Feel free to switch up the yarn or hook size based on what you have available or your preference.
If you are using a different yarn or hook size, don’t forget to make sure that the yarn and hook size work well together. For amigurumi, it’s often recommended to use a hook size that is at least 1-2mm smaller than the recommended hook size on the yarn label for tighter stitches and less holes in your project. However, different crocheters have their own preferences on hook size and you are welcome to follow your own preference.
Please note that the plushie may vary in size with different yarn and hook sizes.
-
Yes! Just like the yarn and hook size, the safety eyes listed are just what I used to make the plushie in the sample photo. Feel free to use a similar eye size or switch it up with felt, buttons, or even just embroider it with yarn.Please note that safety eyes can be choking hazards and are not recommended for plushies made for young children or pets.
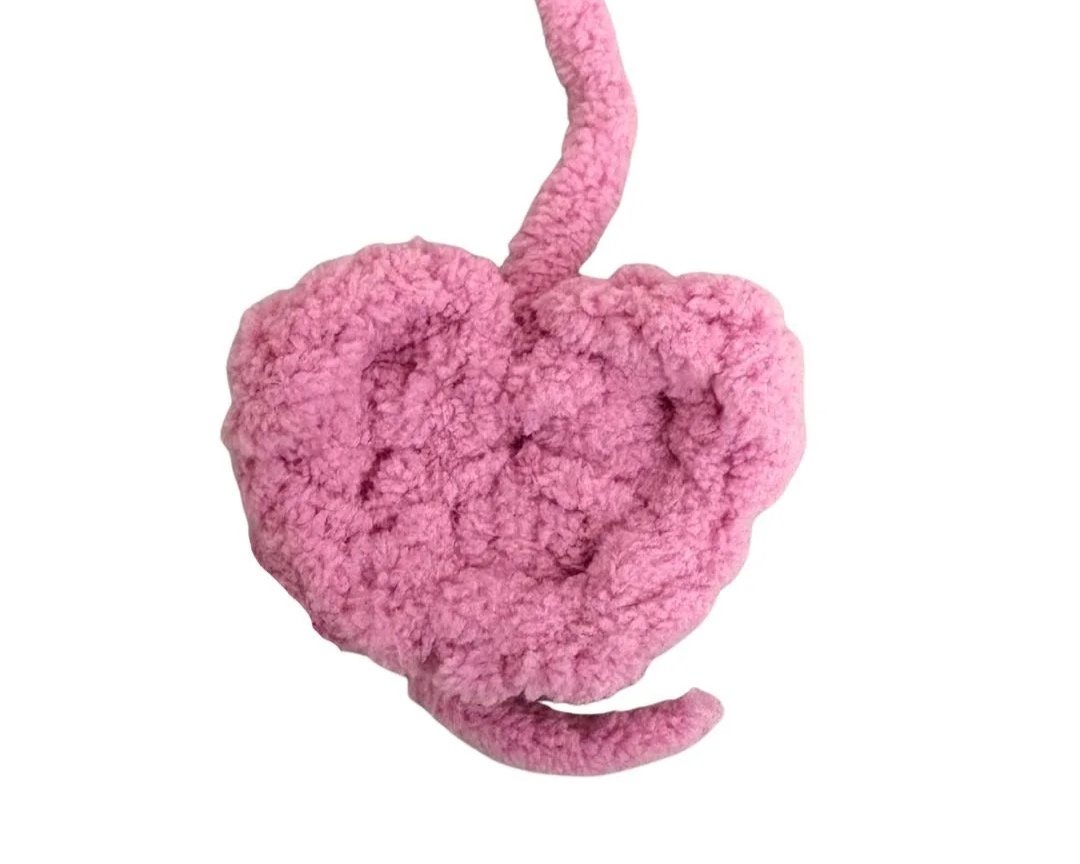
Heart Patch
Using Darker Pink
R1: In a MR, CH 3, 2 DC, 2 HDC, DC, 2 HDC, 2 DC, CH 2, SL ST (15)
FO leaving a long tail for sewing.
A video visual on how to crochet the heart patch can be found here.
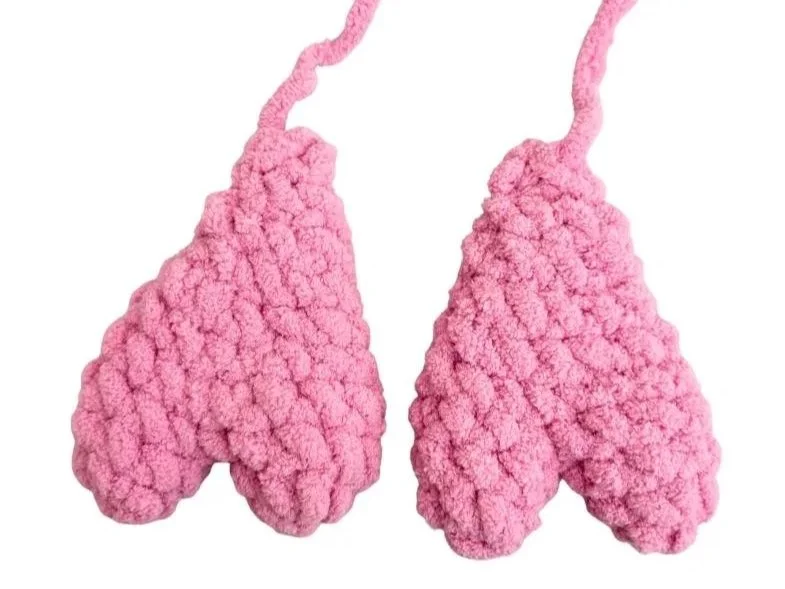
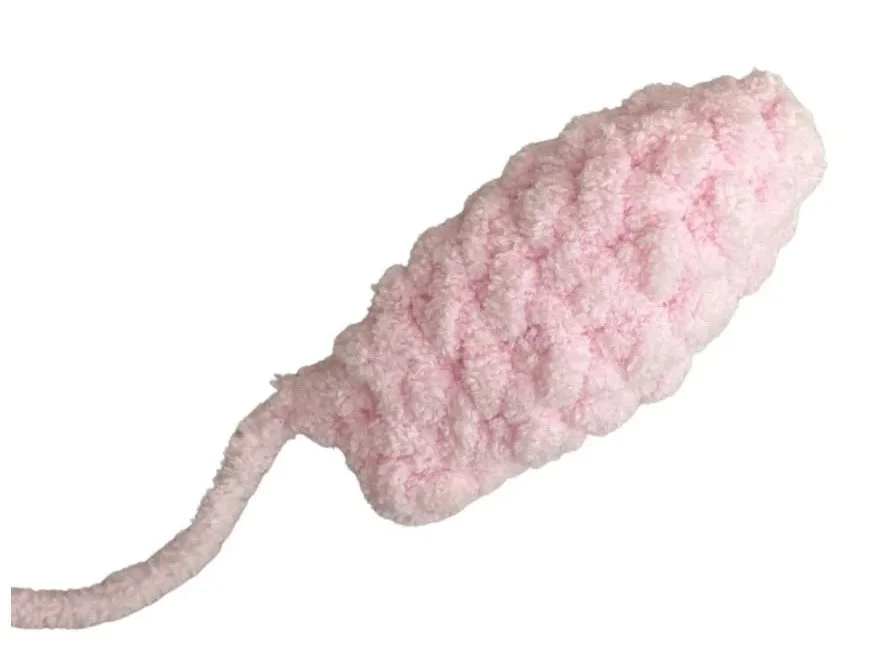
Heart Ears (Make 2)
Using Darker Pink
R1: 4 SC in a MR (4)
R2: [INC] x 4 (8)
R3: 8 SC (8)
FO leaving a long tail for sewing.
Repeat R1-3 to make a second piece, but do NOT fasten off. Instead, continue on to the next round to connect the two pieces.
R4: Insert your hook into the first stitch of the first piece (it should be the stitch after where you fastened off).
Make 8 SC (one SC in each stitch around the piece).
Insert your hook into the second piece and make 8 SC around the second piece (16)
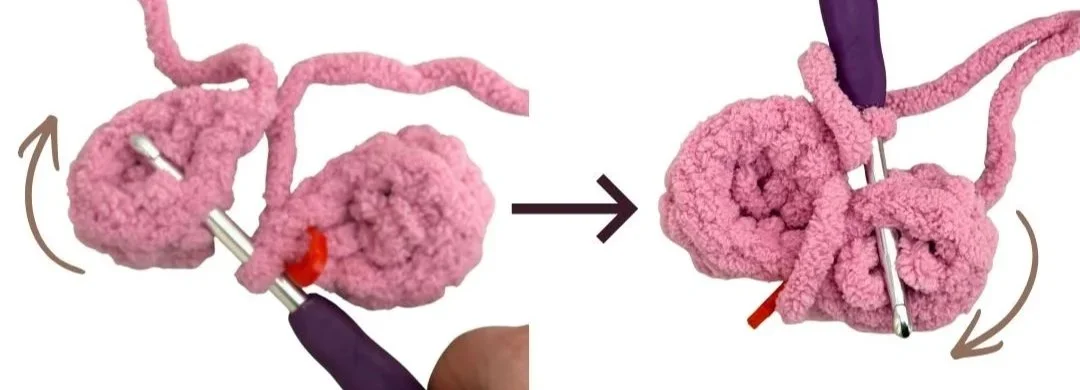
Connecting the two pieces of the ear (Picture Reference)
R5: 16 SC (16)
Use the yarn tail leftover from fastening off the first piece to sew closed any gaps in between the pieces.
R6: [2 SC, DEC] x 4 (12)
R7: 12 SC (12)
R8: [SC, DEC] x 4 (8)
R9: 8 SC (8)
R10: [DEC] x 4 (4)
FO leaving a long tail for sewing. Do not stuff the ear.
Fold the opening in half and sew the two sides together.
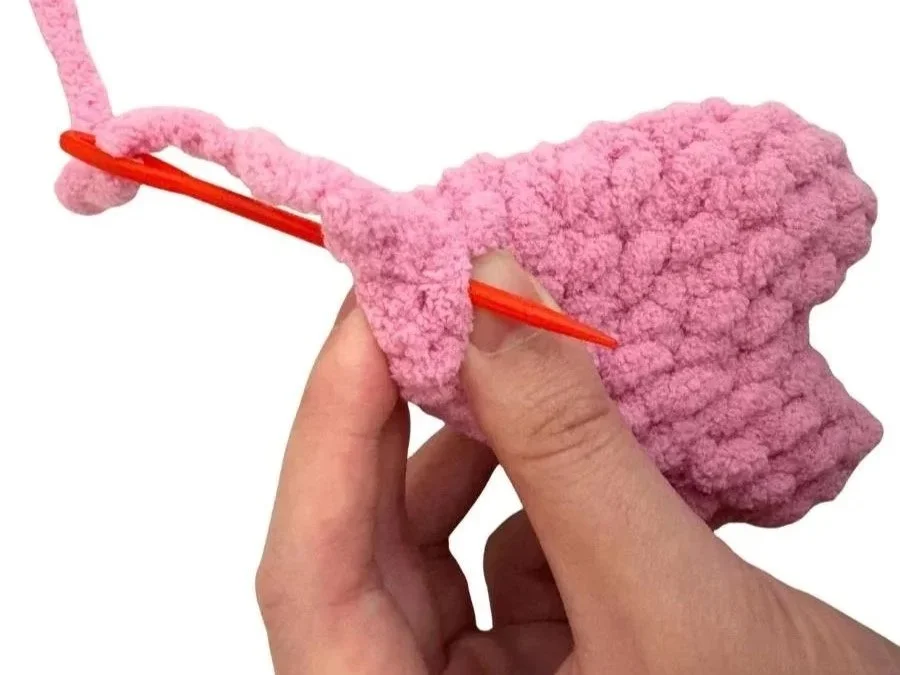
Sewing the ears closed (Picture Reference)
Leave the rest of the yarn tail to sew the ear onto the head later.
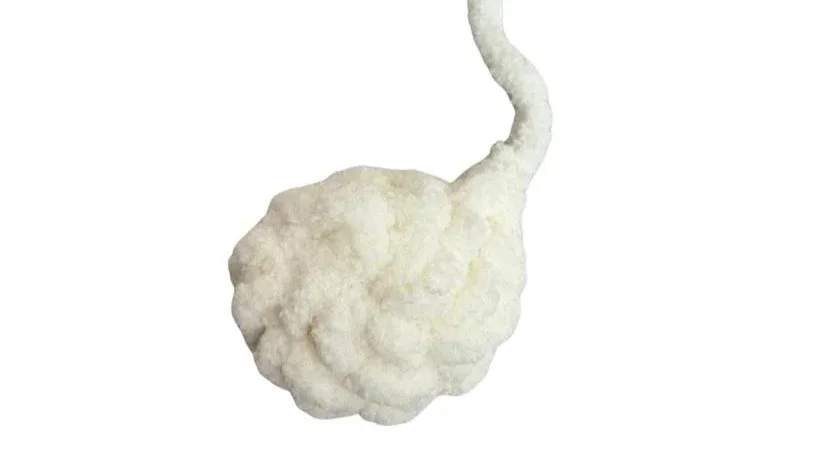
Tail
Using Light Pink
R1: 4 SC in a MR (4)
R2: [SC, INC] x 2 (6)
R3: [2 SC, INC] x 2 (8)
R4-7: 8 SC (8) 4 Rounds
R8: [2 SC, DEC] x 2 (6)
Lightly stuff.
R9: Fold the remaining stitches in half. Working through the stitches on both sides, make 3 SC (3)
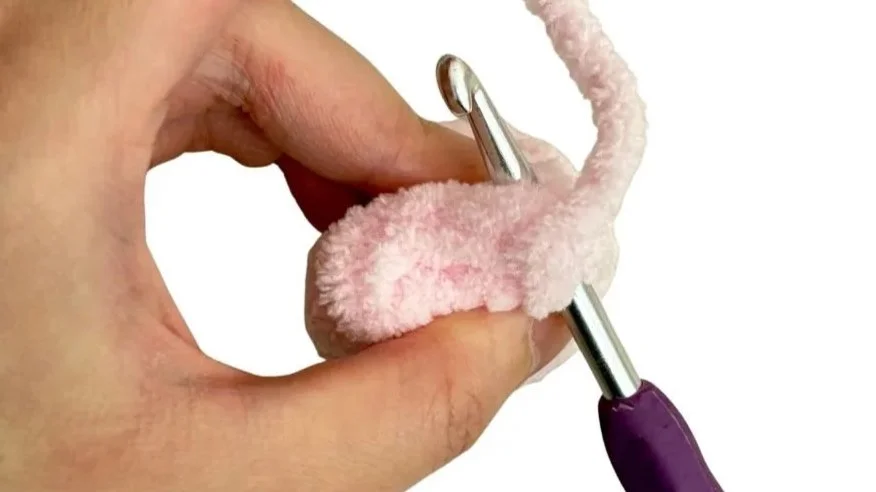
R9 of the Tail (Picture Reference): Here’s how to insert the hook for the first SC to crochet across both sides.
FO leaving a long tail for sewing.
Snout
Using Cream
R1: 6 SC in a MR (6)
R2: [SC, 2 INC] x 2 (10)
R3: 10 SC (10)
FO leaving a long tail for sewing.
Head and Body
Using Light Pink
R1: 6 SC in a MR (6)
R2: [INC] x 6 (12)
R3: [SC, INC] x 6 (18)
R4: [2 SC, INC] x 6 (24)
R5: [3 SC, INC] x 6 (30)
R6: [4 SC, INC] x 6 (36)
R7-12: 36 SC (36) 6 Rounds
R13: [4 SC, DEC] x 6 (30)
R14: [3 SC, DEC] x 6 (24)
R15: [2 SC, DEC] x 6 (18)
We’ll now be continuing on to the body. If you prefer, you can attach the eyes now (instructions located after R22) and start adding stuffing. However, depending on where you place the eyes, you may need to adjust the placement of the bobbles later.
R16: In FLO, [5 SC, INC] x 3 (21)
R17: [6 SC, INC] x 3 (24)
R18 : [7 SC, INC] x 3 (27)
R19-20: 27 SC (27) 2 Rounds
R21: [7 SC, DEC] x 3 (24)
In the next round, we’ll be changing colors to make the bobbles (5-DcBo) in Cream. The rest is worked in the same Light Pink color.
R22: 3 SC, 5-DcBo, 5 SC, 5-DcBo, 4 SC, 5-DcBo, 5 SC, 5-DcBo, 3 SC (24)
Place one eye through the heart patch first and then attach the eyes between R8-9 around 6 stitches apart on the front of the dog (Note: The front is the side where the bobbles are closest together.)
If it’s difficult to attach the eye through both the heart patch and the head, alternatively you can attach the eye through just the heart patch and leave space to sew the patch on later.
Add stuffing and continue stuffing as you go.
R23: [SC, DEC] x 8 (16)
R24: [DEC] x 8 (8)
FO leaving a long tail for sewing. Finish stuffing.
Use the yarn tail to sew the plushie closed.
Sew the heart patch down.
Assembly
Optional: Use pins to hold the pieces in place to help with the placement.
Tail:
Sew R8 and 9 of the tail flat against R22 and 23 on the back of the body.
Note: You may choose to attach the tail slightly higher if you prefer.
How to position the tail for sewing (Picture Reference)
Snout:
Sew the snout onto R9 through R11 of the face and between the eyes. The snout may partially overlap over the heart patch. When you’re 75% of the way done with sewing on the snout, add stuffing before sewing on the rest of the snout.
Using Brown, embroider the nose onto the snout by looping the yarn around a few times towards the upper half of the snout. Then from the center of the nose, bring the yarn down into a line.
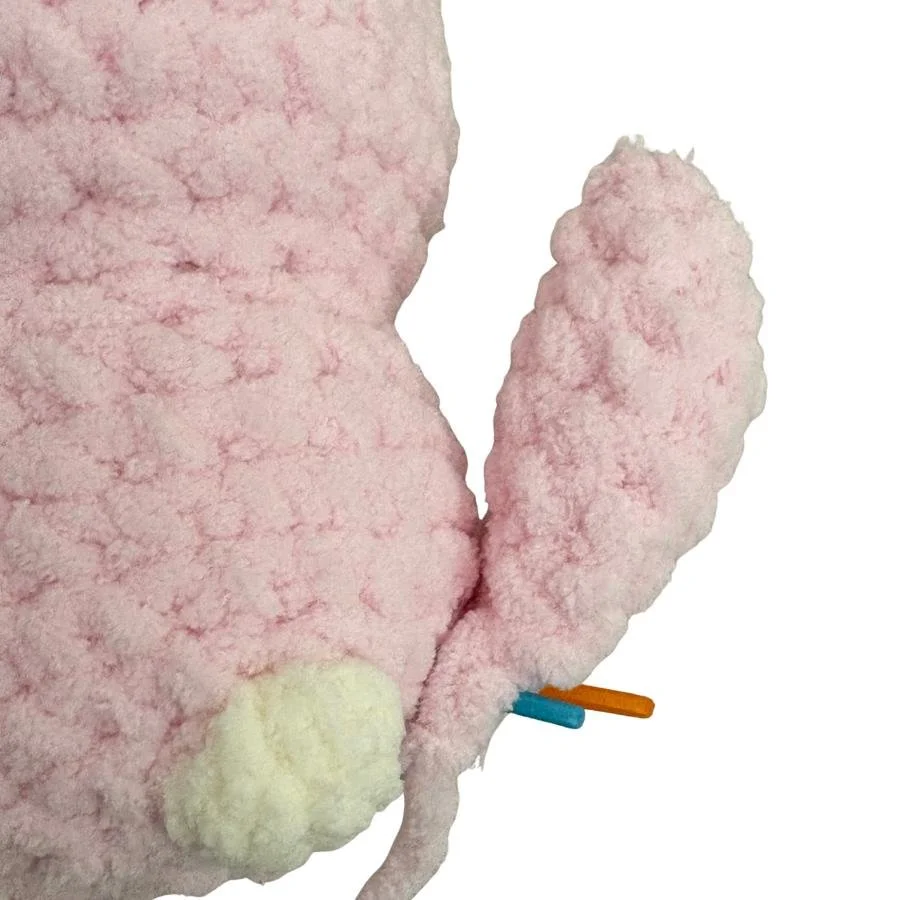
Ears:
Sew the ears on the sides of the head with R10 of the ears sewn flat against R6 of the head. To hold the ears flatter to the head, continue sewing the next four rounds down the ears to the head.
Congratulations! You finished your puppy!
Thank you so much for following along with my pattern! I hope you enjoyed making this plushie. Please feel free to contact me if you have any questions or if you find any mistakes.
If you do post your puppy, I love seeing the plushies you make! Follow and tag my socials! Instagram, Tik Tok, YouTube: @themaryjay
Ready for another Heart-themed Crochet project?
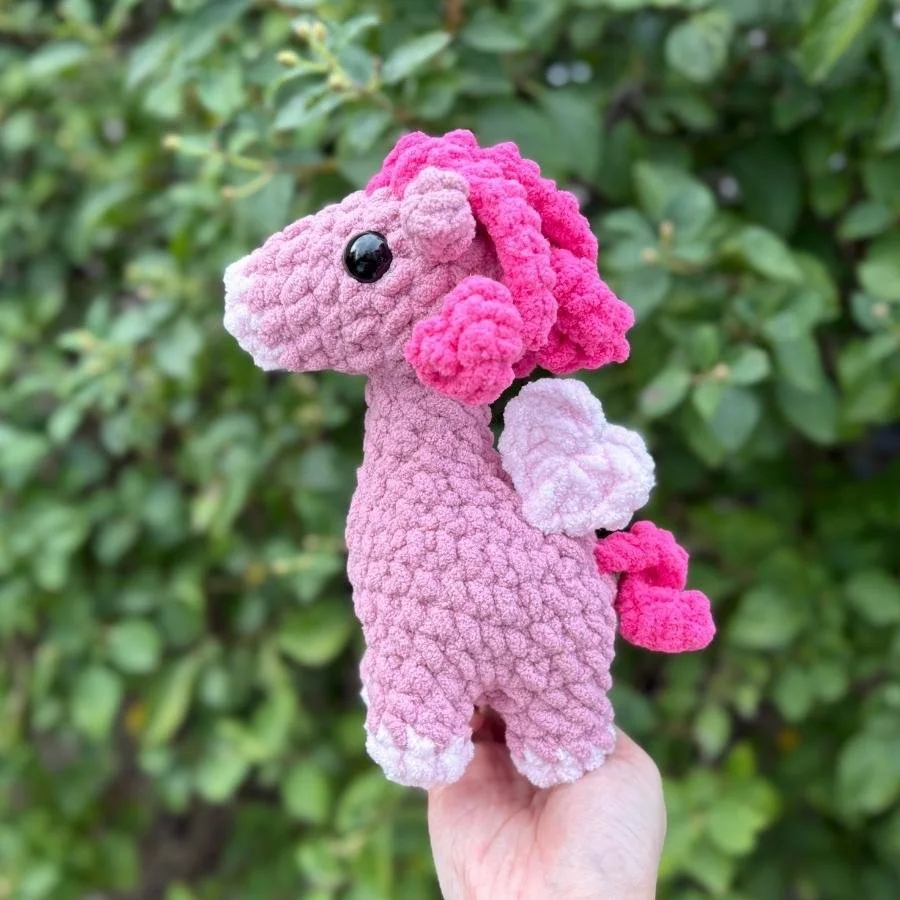
Check out my free heart-winged pegasus pattern! The heart wings are crocheted in the same way as the puppy’s heart-patch.
Find more free patterns here!
You can also find more patterns in my shop or on my Patreon!