
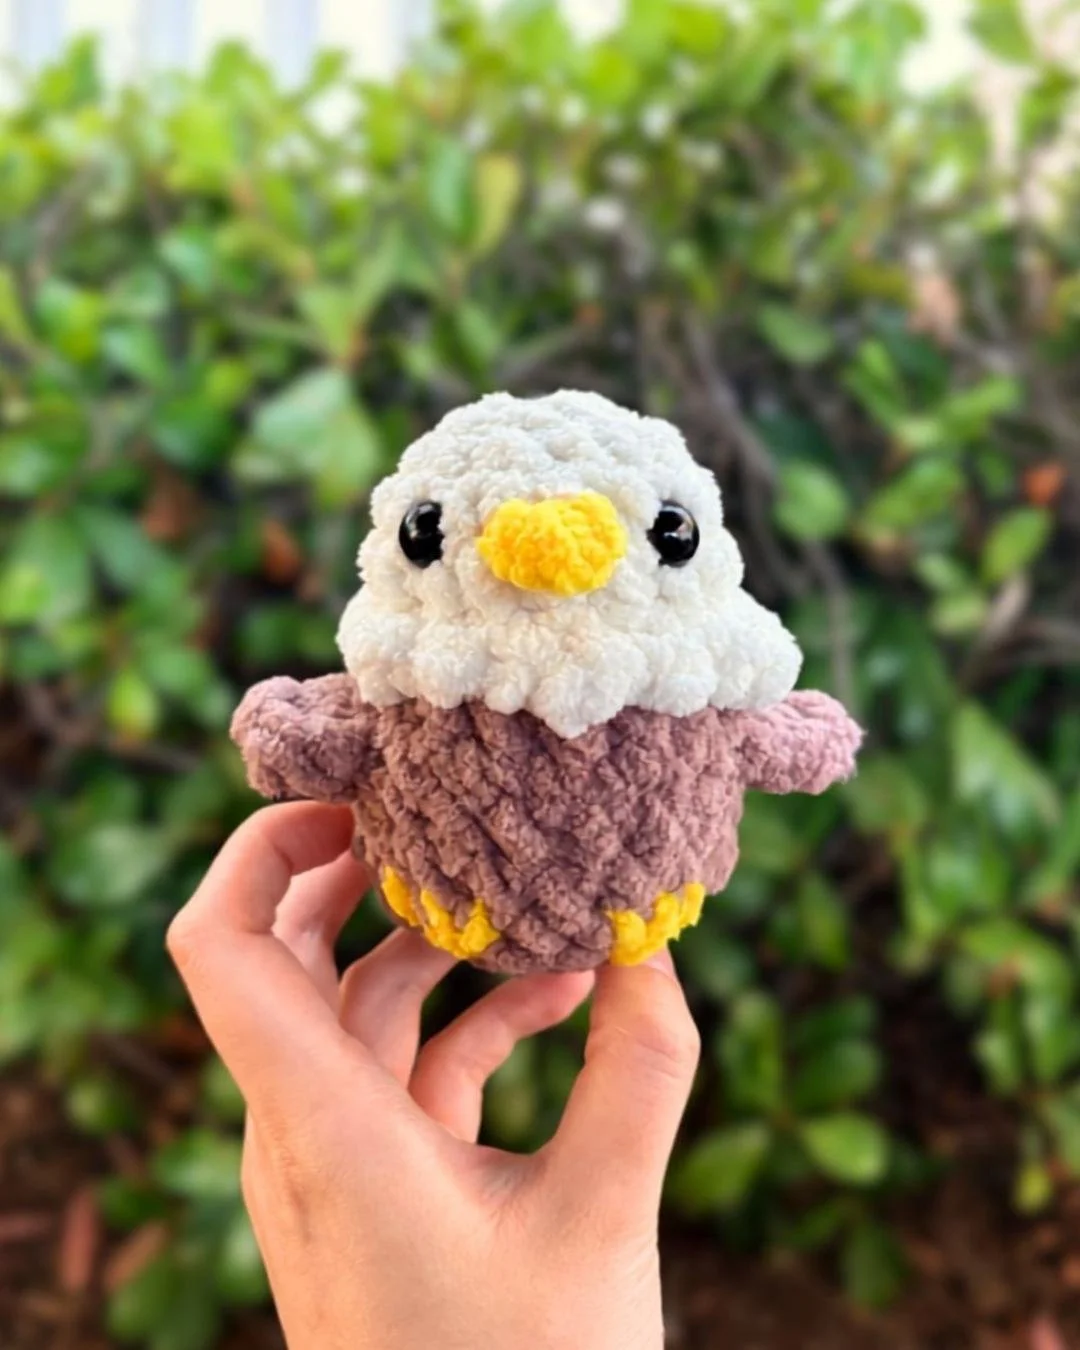
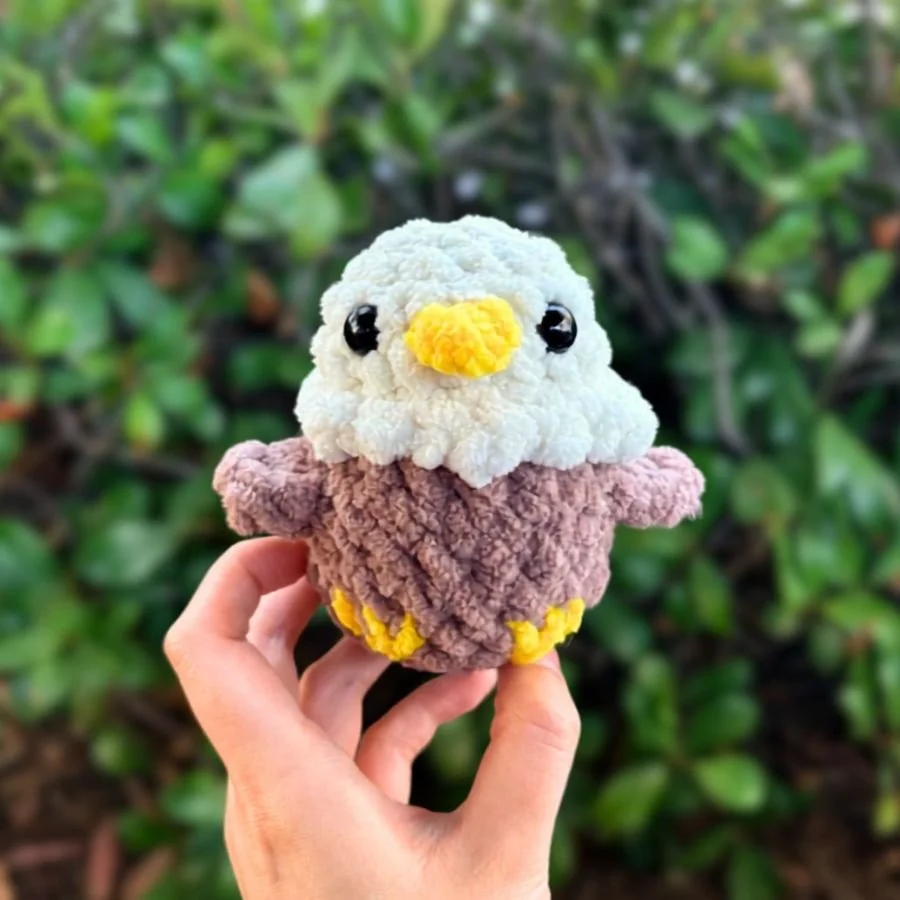
Little Eagle Crochet Pattern (No sew!)
If you’re looking for a fast, no-sew, and adorable amigurumi project, this little eagle is just the thing. Find the free crochet pattern below!
Welcome to the first bird pattern in (hopefully) a soon-to-be collection of no-sew mini bird patterns.
Raptors were once my favorite kind of bird! I had a whole phase in middle school, where I would print pictures of hawks, falcons, eagles, and owls, just so I could look at them. So for this collection, I wanted to make sure to include a raptor, and what is more iconic than a bald eagle?
Since I just made a low-sew garden bird in my 6-in-1 garden flower pot pattern, I wanted to make this eagle in a similar style . . . BUT this time, completely no-sew!
Just like the garden bird, the head, body, and wings are crocheted as one continuous piece. And now the beak too, is also crocheted on directly just like the tail! Please note, this little eagle is slightly taller than the garden bird.
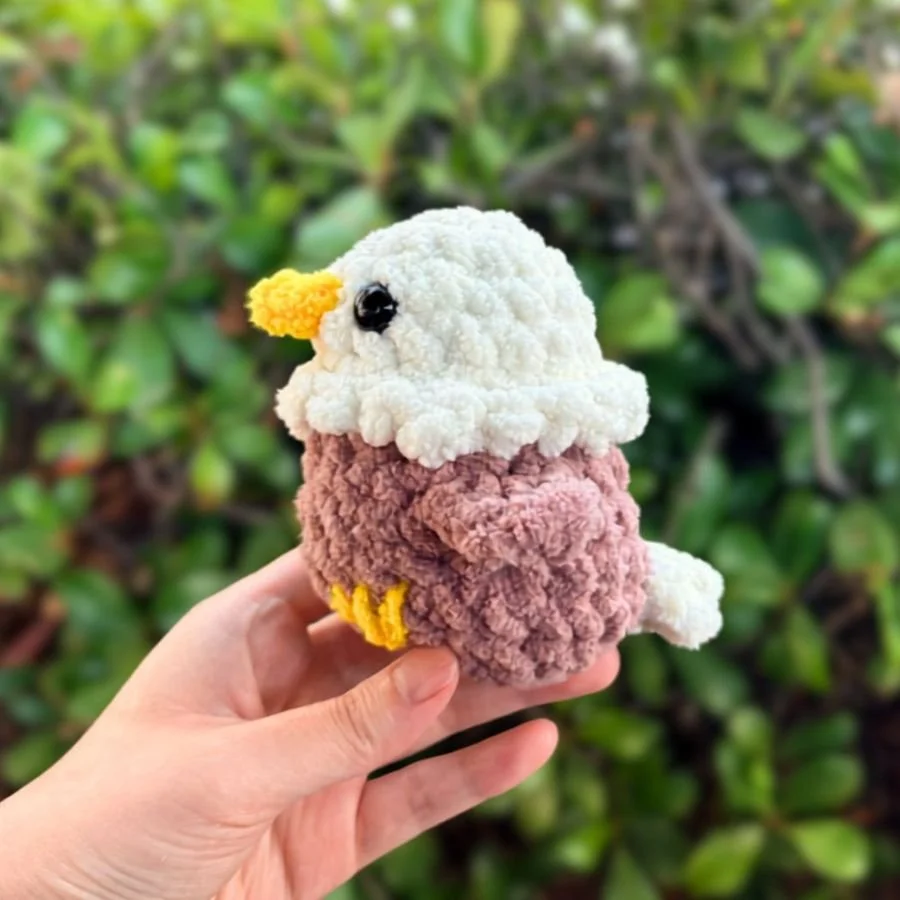
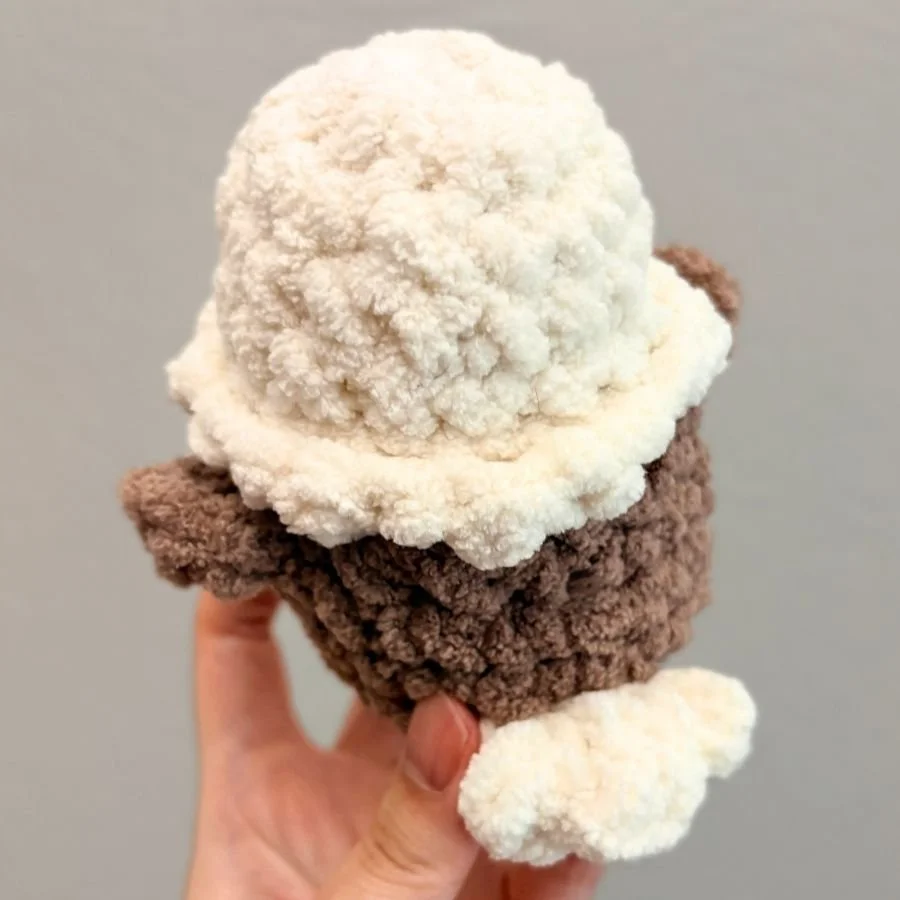
p.s. check out the side view!
Standing at just around 3.75 inches tall based on the yarn, hook, and tension I used, this little eagle can be crocheted as an ornament, a keychain, a pocket buddy, a desk buddy, or a quick make for markets/shops, gifts, or just a no-sew mini project for yourself!
You can also make it smaller by using a smaller hook, tighter tension, or thinner yarn. Likewise, make it bigger by doing the opposite!
So let’s get into the pattern!
A PDF version of this pattern is also available on Patreon.
Unless otherwise indicated, this pattern is designed to be crocheted in continuous rounds (or spirals).
Terms of Use:
This crochet pattern is designed by me (The Mary Jay). Do not copy, sell, duplicate (to distribute) the contents of this crochet pattern in any format without permission.
If you’d like to share this pattern, please only do so by linking to this blog post or sharing where to find its original source. Do not copy any part of the pattern to post, share, or publish anywhere else without written permission.
You’re absolutely welcome to sell the plushies you make using this pattern provided that you give pattern credit to The Mary Jay (and/or @themaryjay). I’d also super appreciate if you’re able to include where to find this pattern (www.themaryjay.com) as this helps me continue to create free patterns for you.
p.s. Tag me @themaryjay on Instagram, Tik Tok, YouTube etc, so I can see them too!
Skills and Abbreviations (In U.S. terms)
MR= Magic Ring (Magic Circle)
SC= Single Crochet
SL ST= Slip Stitch
HDC= Half Double Crochet
DC= Double Crochet
INC= Increase (2 SC in the same stitch)
DEC= Decrease
FLO= Front Loop Only
BLO= Back Loop Only
CH= Chain
FO= Fasten off (Recommended: Invisible Fasten Off)
R= Round/Row
Change Color & Slip Knot
Bonus Skills Explained:
Turn= Flip your work to crochet the row in the opposite direction.
Standing Single Crochet= Start by making a slip knot and placing it on your hook. Then insert your hook into the indicated stitch and make a SC as usual (pull the yarn through the stitch, yarn over and pull the yarn through both loops on the hook.) This is used to join yarn for the body and tail, but please feel free to use another join method if you prefer an alternative.
Materials:
(Based on what I used to make the eagle in the sample photos)
Super Bulky Weight Yarn (#6) in Brown, White, and Yellow
I used less than 13 yards of Premier Basix Chenille Brights for the Brown, less than 11 yards for the White, and scrap yarn for the Yellow.
Two 12 mm Safety Eyes (Warning: Safety eyes can be choking hazards and are generally not recommended when crocheting plushies for young children/pets. You can replace the “safety eyes” with an alternative.)
5 mm Crochet Hook
Stuffing
Scissors
Yarn Needle
Pins & Stitch Markers (Optional)
The head and body are crocheted as one continuous piece to form the “base.”
Head:
Using White
R1: 6 SC in a MR (6)
R2: [INC] x 6 (12)
R3: [SC, INC] x 6 (18)
R4-6: 18 SC (18) 3 Rounds
Tip: Place a stitch marker into the back loop of the next stitch to make it easier to find later.
R7: In FLO: [SC, DC, SC] x 6 (18)
Invisible Fasten Off (or SL ST into the first stitch and FO). Weave in ends.
Note: Connecting the round and fastening off here helps create a more seamless finish to the ruffles. We’ll still be able to crochet the body continuously from the head by joining new yarn with a standing single crochet (more on this in the “Body” section or above in “Bonus Skills Explained”), or you can use another join method if you prefer. However, if you’d rather continue crocheting directly and don’t mind having a more visible jog , you can also just change colors and proceed directly to R8.
Body:
Using Brown
In the next round (R8), we’ll be crocheting the body in continuation from the head by starting with a standing single crochet. To do this, use brown yarn (or your body color) to make a slip knot and place it on your hook. Then insert your hook into the first back loop of R6 (where we placed the stitch marker) and make the first SC of the round. Continue crocheting the rest of the round as usual.
R8: In BLO of R6: 18 SC (18)
R9: 4 SC. Then in FLO of one stitch: [SL ST, HDC, DC, CH 1, DC, HDC, SL ST]. Tip: Place a stitch marker into the back loop of that stitch to make it easier to find later. 8 SC. In the FLO of one stitch: [SL ST, HDC, DC, CH 1, DC, HDC, SL ST]. Tip: Place a stitch marker into the back loop of that stitch to make it easier to find later. 4 SC (30)
R10: 2 INC, 2 SC, [1 SC in the BLO of R8 under the wing and where we placed the stitch marker], 8 SC, [1 SC in the BLO of R8 under the wing and where we placed the stitch marker], 2 SC, 2 INC (22)
R11-12: 22 SC (22) 2 Rounds
Attach the eyes between R4 and 5 around 4 stitches apart.
Add stuffing and continue stuffing as you go.
For the rest of the body, [SC, DEC] and repeat until you only have 8 stitches left.
FO leaving a tail for sewing. Finish stuffing.
Use the yarn tail to sew the plushie closed.
Tail:
Using White
The tail is crocheted directly onto the back of the body. To do this, start with a slip knot on your hook.
R1: Between R11 and 12, insert your hook into the back of the bird and make 3 SC that are centered on the back of the bird (3).
R2: CH 2 and Turn,
In the first stitch: DC, SL ST,
In the second stitch: 2 DC,
In the third stitch: SL ST, DC, CH 1, SL ST (8)
FO and weave in ends.
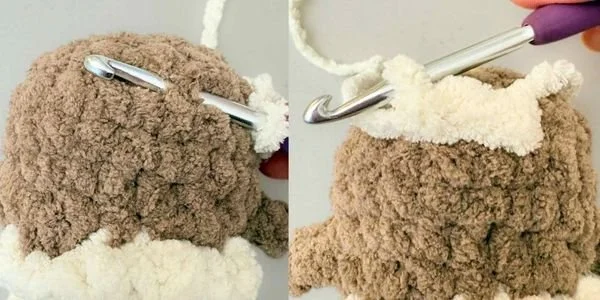
Beak:
Using Yellow
The beak is crocheted directly onto the face between R4 and 5 between the eyes. A picture reference for the next 3 steps is included below.
Find the center point between the eyes and move one stitch to the side. Pull up a loop.
CH 2 and then in the second chain from the hook, make a SC.
Insert your hook into the next stitch between R4 and 5 (this should be the stitch on the other side of the center point) and make a SL ST.
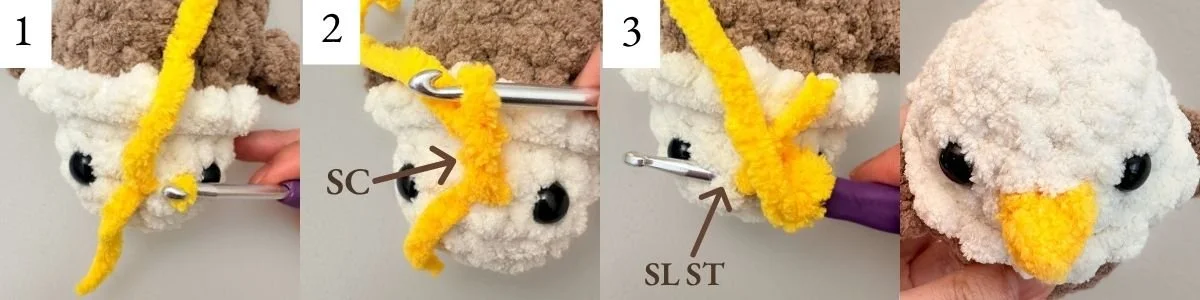
FO and weave in ends.
Feet:
Using Yellow, embroider the feet onto R12 and R13 around 2 stitches apart from one another.
To embroider each foot, start by sewing a horizontal line between R11 and 12 that’s around two stitches wide and roughly lined up to one of the eyes.
From inside of the plushie, bring the yarn down to exit two rounds below the center of the line. Loop the yarn around that first horizontal line and pull it down to create a “v-shape.”
Then loop the yarn around one more time to create a line down the middle of the “v-shape.”
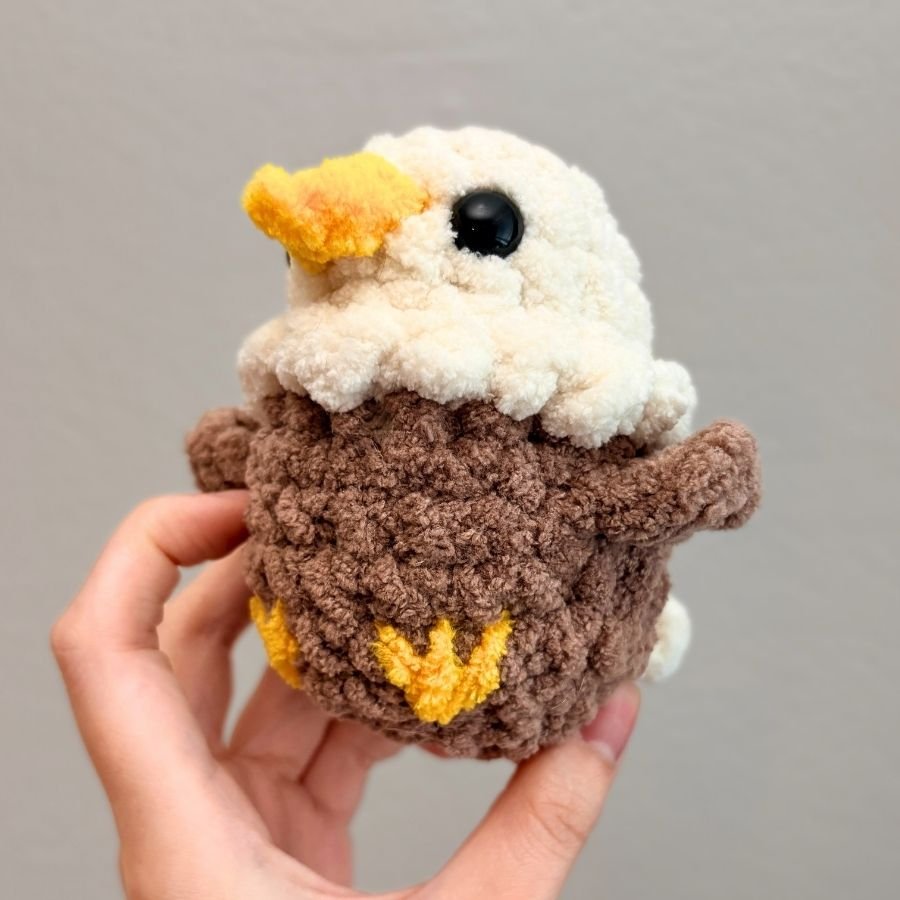
Congratulations! You did it!
Thank you so much for following along with my pattern and taking the time to make a little eagle! It means so much to me!
If you enjoyed this pattern, don’t forget that you can subscribe to my mailing list to receive updates on new patterns straight to your inbox.
Please feel free to share the link to this post or where to find it with other crocheters. Every share helps support my art, and allows me to continue creating free patterns and resources for you.
If you have any questions or find any mistakes, please feel free to contact me.
I love seeing your work! Follow and tag my socials! Instagram, Tik Tok, YouTube: @themaryjay if you post your plushie!
Ready for your next make?
Find more free patterns here and more no-sew patterns here!!
You can also find more patterns in my shop or on my Patreon.