
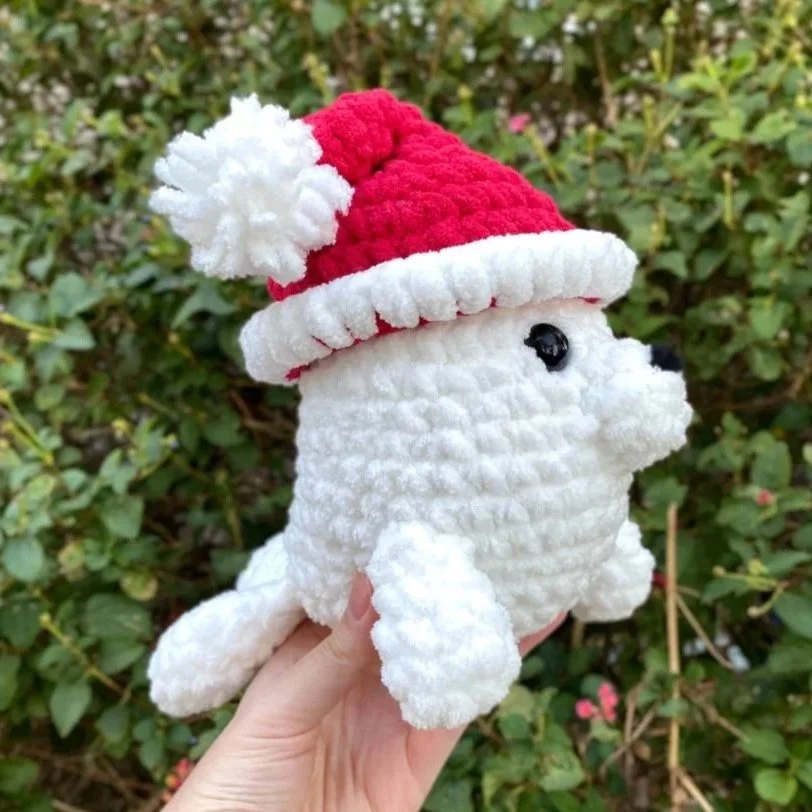
Christmas Seal Pattern: How to Crochet a Santa Hat
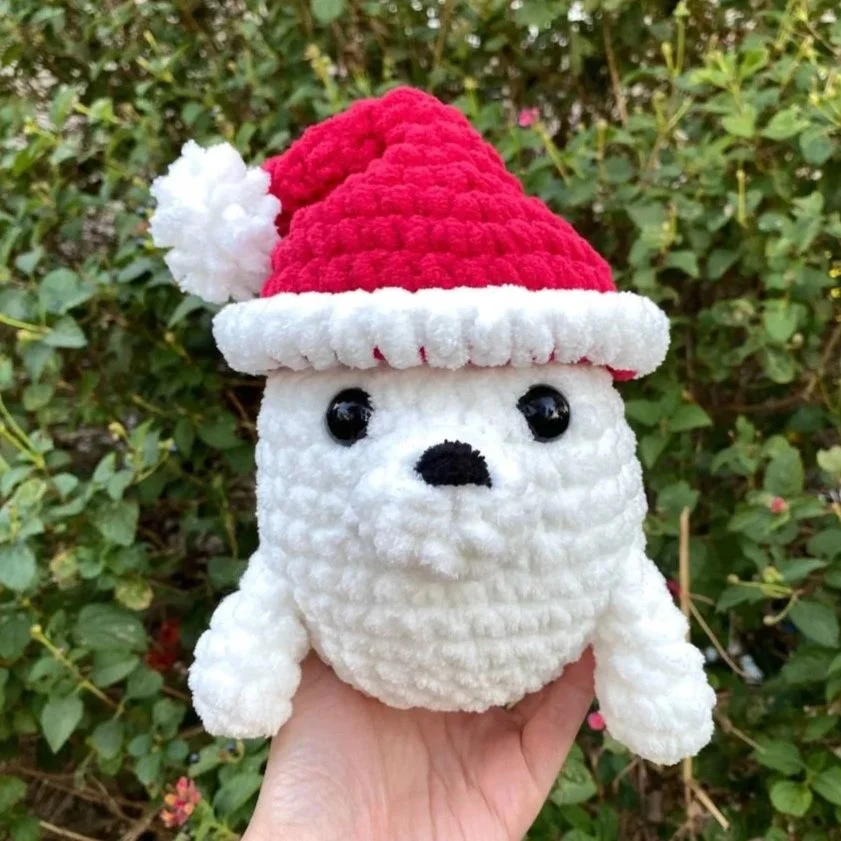
While this Santa hat was designed to fit the seal, you can also make the hat as its own project or as an accessory for another plushie in a similar size.
The widest part of the seal’s head that fits with the hat is 30 single crochets and around 12 inches circumference. However, size can vary based on tension.
To Make the Santa Seal . . .
Make the seal first using my free seal pattern or you can also choose to make the hat first with the pattern below.
I designed the hat using the same size hook and yarn as the seal, so I recommend using the same type of yarn and hook to make both.
However, variations in yarn and tension can affect the fit of the hat. If you find the hat is too loose or too tight for your seal, you can try sizing your hook size down (for too loose) or up (for too tight) when making the hat.
How to Crochet the Santa Hat:
This pattern is designed to be crocheted in continuous rounds (or spirals) unless otherwise mentioned.
Terms of Use:
Please do not copy, sell, or duplicate (to distribute) the contents of this crochet pattern in any format without permission. If you’d like to share this pattern, I’d really appreciate it if you could share where to find this blog post as this helps me continue to make free patterns for you!
What you do with the finished plushies you make is solely your responsibility.
You may sell the plushies you make using my patterns, but please give pattern credit to The Mary Jay and link back to this post whenever possible.
Skills and Abbreviations (In U.S. terms)
MR= Magic Ring (Magic Circle)
SC= Single Crochet
SL ST= Slip Stitch
HDC= Half Double Crochet
CH= Chain
FLO= Front Loop Only
INC= Increase
DEC= Decrease
FO= Fasten off (Recommended: Invisible Fasten Off)
R= Round
Slip Knot
Recommended Materials:
(Based on what I used to make the hat in the sample photos)
Super Bulky Weight Yarn (#6) in White and Red
6 mm Crochet Hook
Scissors
Yarn Needle
Pins & Stitch Markers (Optional)
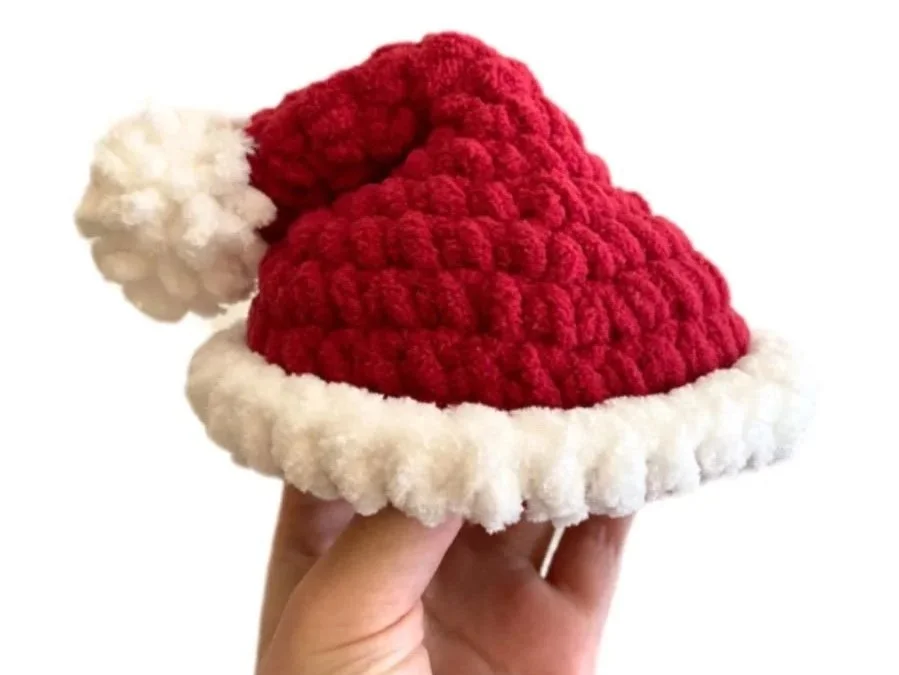
Santa Hat
Using Red
R1: 4 SC in a MR (4)
R2: [SC, INC] x 2 (6)
R3: [2 SC, INC] x 2 (8)
R4: [3 SC, INC] x 2 (10)
R5-7: 10 SC (10) 3 Rounds
R8: [SC, INC] x 5 (15)
R9: [2 SC, INC] x 5 (20)
R10: [3 SC, INC] x 5 (25)
R11: [4 SC, INC] x 5 (30)
R12: [5 SC, INC] x 5 (35)
R13-14: 35 SC (35) 2 Rounds Tip: If you’d like less red showing on the bottom of the hat, make R14 in White.
Change color to White
R15: In FLO, SL ST, CH 1, 34 HDC
Place one last HDC into the second stitch (this is the CH that we made, skipping the SL ST) (35)
Invisible Fasten Off or SL ST into the next stitch and FO. Weave in the yarn tails.
Flip R15 upwards to create the rimmed-look of the hat.

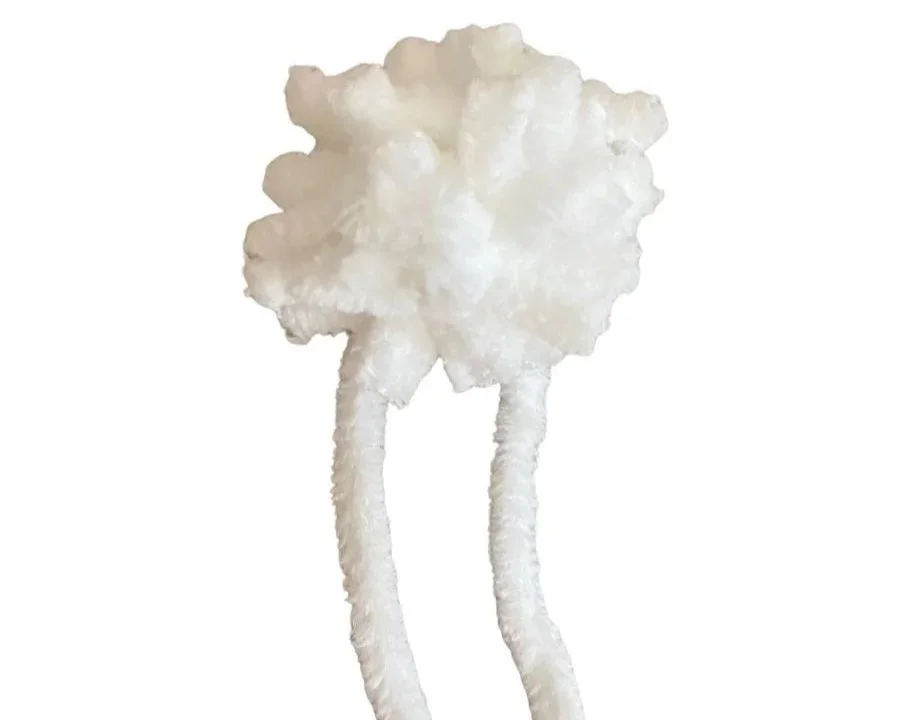
Using White, make a pom pom. A guide on how to make a pom pom with your hand can be found here. Sew the pom pom onto R1 of the hat.
Fold the hat between R6 and 7 to bring the top of the hat down
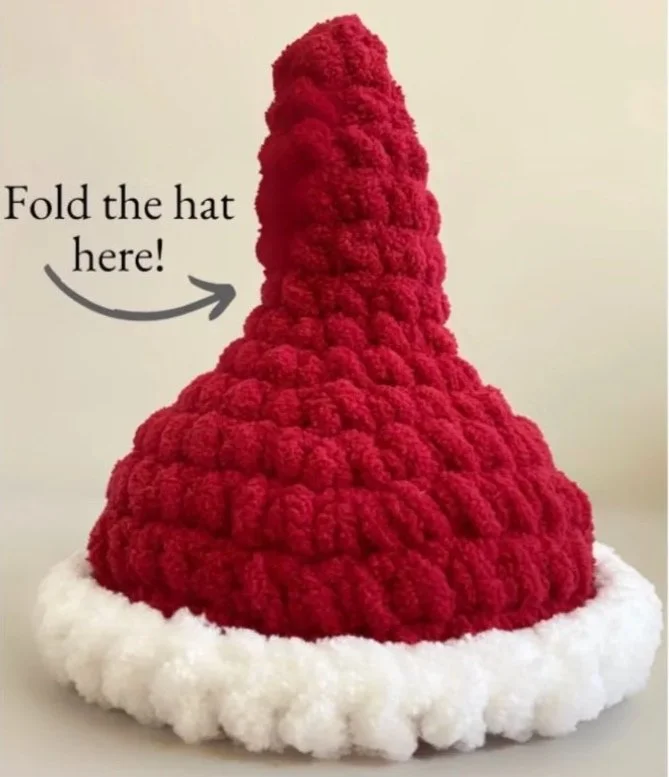
Sew the top down to create the floppy look.
And that’s it! Congratulations you finished your Santa hat!
To complete your Santa seal, follow the free seal pattern here if you haven’t yet.
Make the seal a whole wardrobe of hats!

Here’s where to find the full 4-in-1 pattern if you want to make all four winter-themed seal hats. There’s a bonus fifth hat too! You can purchase the 4-in-1 on my Etsy or on my Patreon.
Looking for another Christmas crochet project?

Find the free gingerbread stegosaurus pattern here!
Find more free patterns here !
You can also find more patterns in my shop or on my Patreon!